Stencils bring so much inspiration for me. They allow me to have a jumping off point for a project. Today I wanted to share my excitement about Spring.
The natural choice was Dutch Spring created by 'Art by Marlene' from Crafters Workshop. Please see the supply list below, along with some tips for getting you stencil ready.

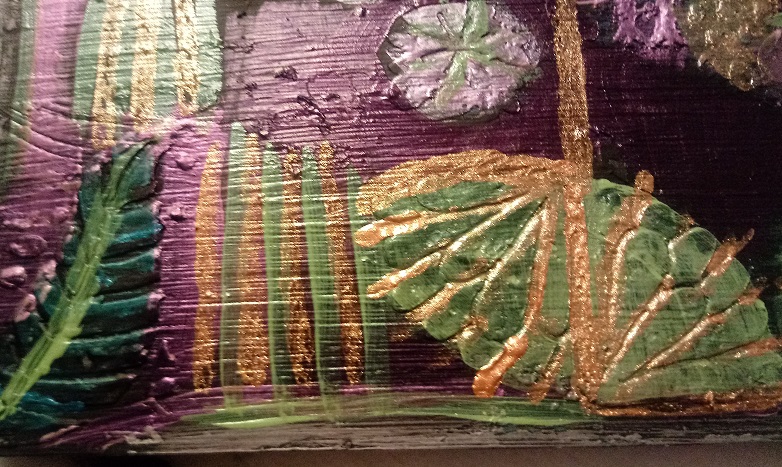
Bright, colors are perfect for this stencil.
I have to say that I cheated and got a dollar store substrate, for one buck, you can't go wrong! I gessoed the board first and then used modeling paste with another layer of black gesso (quite honestly because my white gesso had sat too long without being shaken and was clumpy! Drying it as I went with my heat gun. Then I began laying oil pastels and acrylic paints freely.


Have you reviewed our stencil selection? Take a peek to get yourself inspired.

Canvas Board - choice of sizes (so affordable)
Oil Pastels
Chip Brush
Gesso - pick a size
Art Anthology and Prima Paints
A Foam Brush can be used but watch for bubbles.
See some of our newest one of a kind items...new religious icon items and some lovely jewelry pieces.


The natural choice was Dutch Spring created by 'Art by Marlene' from Crafters Workshop. Please see the supply list below, along with some tips for getting you stencil ready.
Bright, colors are perfect for this stencil.
I have to say that I cheated and got a dollar store substrate, for one buck, you can't go wrong! I gessoed the board first and then used modeling paste with another layer of black gesso (quite honestly because my white gesso had sat too long without being shaken and was clumpy! Drying it as I went with my heat gun. Then I began laying oil pastels and acrylic paints freely.

Dollar store substrate

Gesso, modeling paste and more gesso


This became more a study in texture and color rather than a traditional stenciled work. For the most part I allowed the raised modeling paste areas to guide my paints.

Have you reviewed our stencil selection? Take a peek to get yourself inspired.

Canvas Board - choice of sizes (so affordable)
Oil Pastels
Chip Brush
Gesso - pick a size
Art Anthology and Prima Paints
A Foam Brush can be used but watch for bubbles.
See some of our newest one of a kind items...new religious icon items and some lovely jewelry pieces.


Comments
Post a Comment