Let me count the ways you can use Emerald Creek embossing powder! Today I took a small tart tin and embossed it to create my ornament.

Supplies:
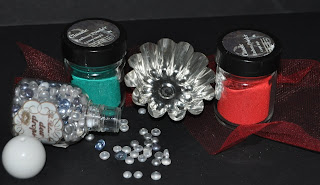
Altered Pages collage Christmas Bottle Caps
Emerald Creek Candy Red Embossing Powder
Emerald Creek Candy Green Embossing Powder
VersaMark
Tart Tin
Bottle Cap
Dew Drops
Tulle
Glue
Ribbon


 Punch an image from the Altered Pages collage Christmas Bottle Caps. Edge the image with VersaMark, apply Emerald Creek Candy Green Embossing Powder, gently heat with heat tool.


Supplies:
Altered Pages collage Christmas Bottle Caps
Emerald Creek Candy Red Embossing Powder
Emerald Creek Candy Green Embossing Powder
VersaMark
Tart Tin
Bottle Cap
Dew Drops
Tulle
Glue
Ribbon


Apply VersaMark (direct from the pad) to the outside of the Tart Tin, dust with Emerald Creek Candy Red Embossing Powder, gently heat with heat tool. Be careful not to burn yourself when heating the metal.

Apply VersaMark inside the tine (with a finger on the ridges), dust with Emerald Creek Candy Red Embossing Powder, gently heat with heat tool. In the bowl of the tin apply VersaMark, dust with Emerald Creek Candy Green Embossing Powder, gently heat with heat tool.


Edge the Bottle Cap with VersaMark, apply Emerald Creek Candy Red Embossing Powder, gently heat with heat tool. Glue the image to the center of the Bottle Cap.

Attach the Bottle Cap to the center of the Tart Tin. With Glue attach Dew Drops around the edge of the tin!

Add tulle to the back and a ribbon to hang the ornament.
What a great little gift!

Comments
Post a Comment