Life is a Beach!

We love the beach!  

What better represents fun days in sun and sand but a Beachball.  

We had to use this one for a fun project and a Father's Day gift! Eddie loves the beach and adores his grandkids! (yes more than me!)

The beachball comes fully sanded and ready to paint or add papers on the three individual pieces.  


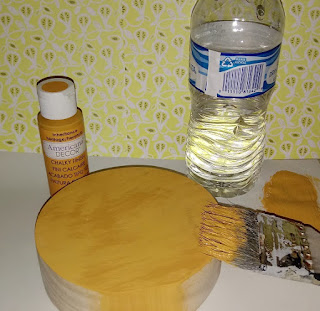
I added Chalk Paint color Inheritance to the base of the ball.
  

Next was choosing a Dixie Belle paint in colors of Gulf or Plum Crazy for the segments, finally choosing Gulf.  Did you know Dixie Belle is non-toxic and made in the USA, all natural, no animal testing and no fumes or harsh chemicals.  You can order it at DIY Design Studio.  I used a Dixie Belle chip brush and it only takes one coat in most all cases.


I trimmed around the ball in a funky paper.  The center disc was covered with the same paper.  When you do not have a punch to get perfect round edges, use an emery board to "shave off" the excess paper. Remember to paint the edge of the circle to match your base or segments color.  Q-tips work great as a paintbrush for small areas.


I then cut out a favorite picture of my grandkids at the beach for the reverse side. This is the same beach where Gabby "made friends" with a sea lion.  When we saw her at waters edge preparing to pet a 400 pound sea creature we calmly suggested she come back near us!!!  He had simply come up on the beach to sun himself and relax.   (calmly???)

   
I got a little more beachy and added some micro beads, glitter, and Seashells around the bottom of the photo to really give it a sandy beach feel.  Haven't yet decided if I will add a piece to the top (like a handle) or just outline the photo with markers or ink.   Maybe more glitter all around?

No matter where it rests, you can feel like you are at the pool or beach! This can be a shelf sitter, desk accessory or as I have done a beach memory photo 'frame'.  On a coffee table, it can be seen from both sides for a fun conversation starter.

Thanks for visiting as we work with Foundations Decor this month as our partner.  Great company, great products and so much more to come!  Wait until you see our Fall and Holiday wooden pieces.


Have a fabulous week and remember to take care of our Earth, it's the only one we have!

Hugs from Jean and the gang.


Comments

Popular posts from this blog

Get on Over!

We like having you visit,  Make sure to subscribe... Just click here - easy peasy November will be filled with Die Cut ART,  join us. Embellish premade pieces art by Barbara Rankin Cut your own pieces Paint or Foil to add interest art by Lyneen Jesse Combine Die cuts in a variety of mediums art by Jean Moore Create with your manual die cutting machine  or buy premade
 Handy Tip for Artists, Recyclers and Neat Freaks! I have a follow-up to the Citra-Sol method for creating fabulous background pages and collages.   I bought a big bag of navel oranges and realized I had the ingredients to make my own solvent!   Simply take a clean glass jar, peel the rind from the oranges and place all the rind/peels, without the pulp (tangerines, oranges, navels) into the jar.   Pour enough vinegar over the peels to cover them.    Allow the jar to sit for a week or two and VOILA!     You have made your own solvent for literally pennies.    You will notice the liquid getting a bit thicker than the plain vinegar and it does not smell bad!!! I now have a  HUGE jar on the window sill!       Be careful and only use this after testing on a safe spot.

Full Circle

Hi all! Becky here today! I have been in a circle-mood lately & have been doing circles on everything! So why not do some circles with some of my Gelli Prints??? Here's a simple little card I made using 4 different circle punches, a black pen & some previously made Gelli prints! Hope you're enjoying Springtime in your area! Cheers!