Hi Everyone, I hope the start to 2017 has been kind to you all. Mine has been busy and I found myself in much need of tidying my craft room. This month here on the blog we are sharing all things peace, love and kindness about of art. I definitely have to say that tidying the art room isn't something I love, however I do love what you find when you have a good tidy up, be it supplies you forgot you owned or revisiting some previous projects and falling in love all over again.

This is kind of what inspired my post today, as I was going through boxes and boxes of card samples I have made in classes, and/or having been inspired by something I had seen on You Tube and the Web and found a card design that I loved and what was even better it had butterflies on it which I totally love so today I am revisiting this design and sharing it with you.


Starting with a square card base (mine are cut 12 x 12 cm) in white. I found two papers in my Authentique Paper Pads that were in similar color ways and also some cardstock in coordinating colors to these papers. Then I proceeded to cut a square from each paper and each cardstock (11 x 11cm).

Taking the square of patterned paper I then cut this in half on the diagonal to give me two equal triangles. Then taking one of these triangles cut this in half to give me two smaller triangles which has a base still equal to the size of my original square.


Then out of white card stock I cut two rectangular pieces ( 9 x 8 cm and 6 x 7 cm). And also a rectangle from the colored cardstock (8 x 7cm).
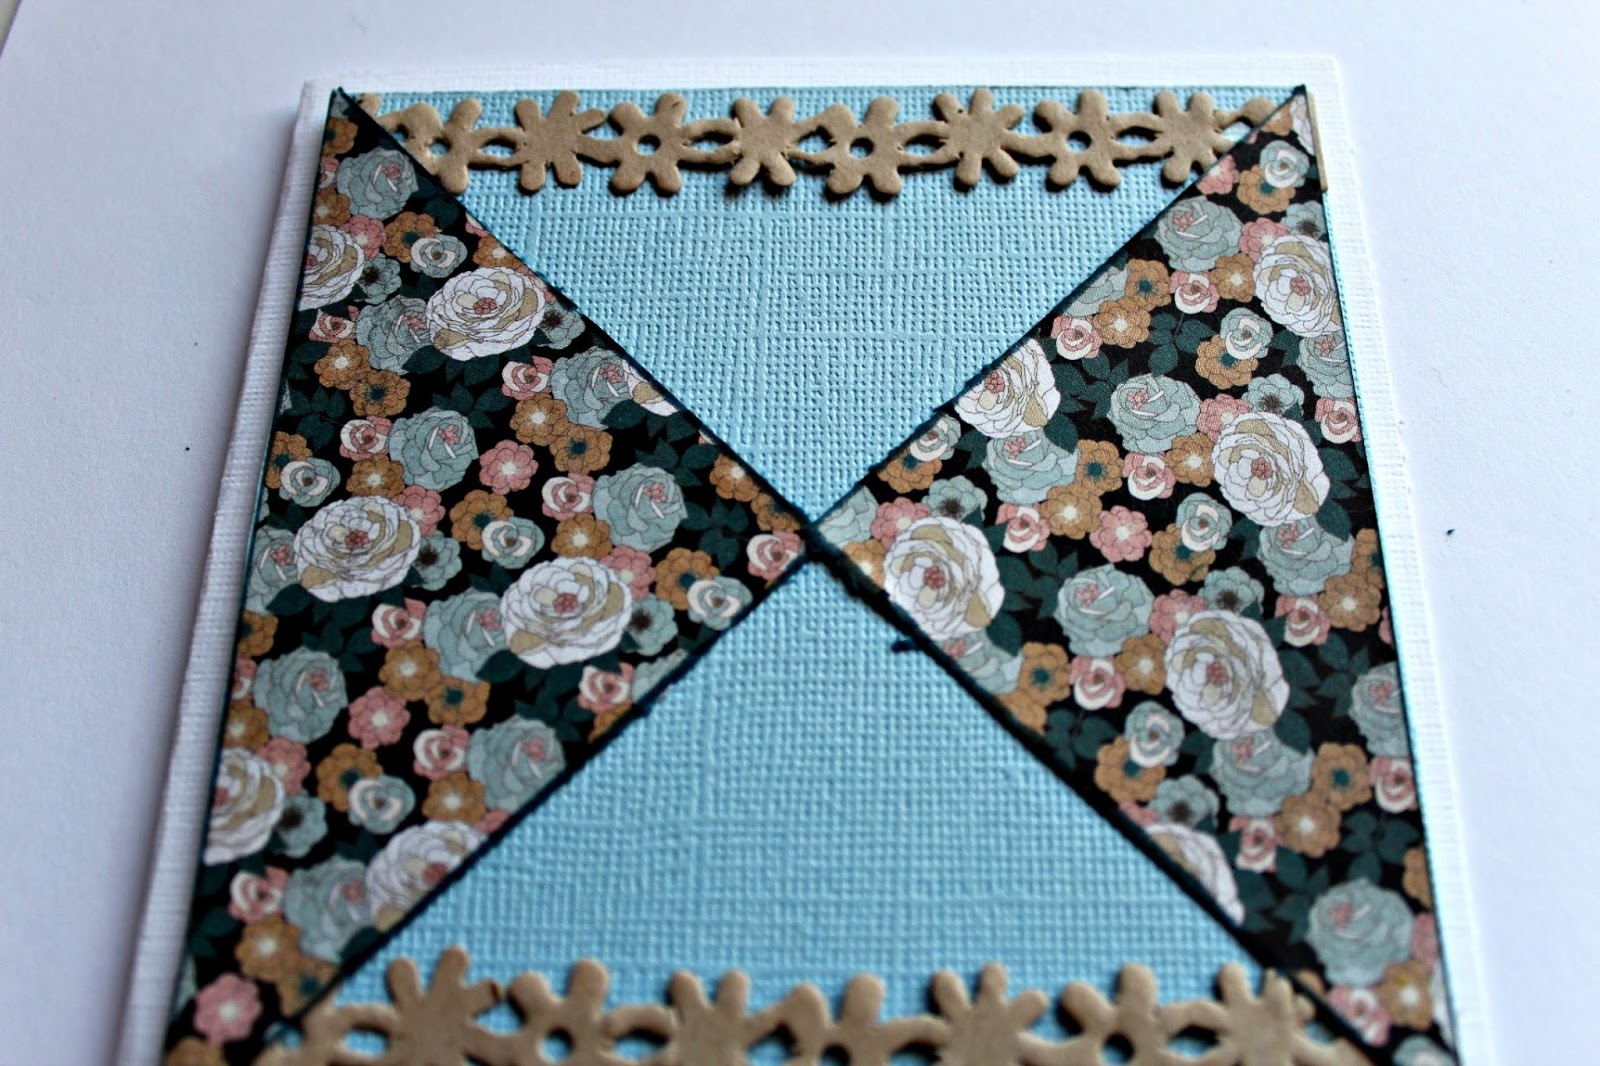
Adding a twist to my original sample I am adding into this design two pieces of the Just an Edge Border Strips by Bazzill in colors that also coordinate with my chosen papers.
Before layering all together I also took out ink colors that would coordinate with my chosen patterned papers from Authentique, My chosen butterfly stamp I then inked and stamped onto the smaller cut white cardstock rectangle and using the same ink inked the edges of both pieces of white cardstock and the two triangles cut from the patterned paper.
Layering begins with the square cut from your chosen color cardstock and then the two border strips and triangles are placed on each side.

Next you take the larger white rectangle and place on a angle. Then the rectangle cut from the coordinating cardstock layering this on a different angle so that it overlaps the edges of the white below it and finally the last layer is your stamped image on the white cardstock. Which again is placed on an different angle to the ones below.

Now it is time to embellish a little. On one of my cards I have added a couple some Petaloo Flowers and on the second card similar to my original sample I have used circle punches cutting a larger 1 inch circle from the coloured cardstock and a smaller 3/4 inch circle from the patterned paper, stuck them together and pierced two holes in it to look like a button. To this I then tied a bow through it using some paper cord in a similar colour to that being used on my card.


To finish off I added a touch of color to the butterflies using some Niji Pearlescent Watercolors. added with a Water Brush.


Obviously you can change up the look of this card design in so many different ways - different border edges, papers, colors, embellishments and instead of stamped images you may like to use collage images and Altered Pages is the perfect place to look for these.
Danie xx
This is kind of what inspired my post today, as I was going through boxes and boxes of card samples I have made in classes, and/or having been inspired by something I had seen on You Tube and the Web and found a card design that I loved and what was even better it had butterflies on it which I totally love so today I am revisiting this design and sharing it with you.


Starting with a square card base (mine are cut 12 x 12 cm) in white. I found two papers in my Authentique Paper Pads that were in similar color ways and also some cardstock in coordinating colors to these papers. Then I proceeded to cut a square from each paper and each cardstock (11 x 11cm).

Taking the square of patterned paper I then cut this in half on the diagonal to give me two equal triangles. Then taking one of these triangles cut this in half to give me two smaller triangles which has a base still equal to the size of my original square.


Then out of white card stock I cut two rectangular pieces ( 9 x 8 cm and 6 x 7 cm). And also a rectangle from the colored cardstock (8 x 7cm).
Adding a twist to my original sample I am adding into this design two pieces of the Just an Edge Border Strips by Bazzill in colors that also coordinate with my chosen papers.
Before layering all together I also took out ink colors that would coordinate with my chosen patterned papers from Authentique, My chosen butterfly stamp I then inked and stamped onto the smaller cut white cardstock rectangle and using the same ink inked the edges of both pieces of white cardstock and the two triangles cut from the patterned paper.
Layering begins with the square cut from your chosen color cardstock and then the two border strips and triangles are placed on each side.
Next you take the larger white rectangle and place on a angle. Then the rectangle cut from the coordinating cardstock layering this on a different angle so that it overlaps the edges of the white below it and finally the last layer is your stamped image on the white cardstock. Which again is placed on an different angle to the ones below.

Now it is time to embellish a little. On one of my cards I have added a couple some Petaloo Flowers and on the second card similar to my original sample I have used circle punches cutting a larger 1 inch circle from the coloured cardstock and a smaller 3/4 inch circle from the patterned paper, stuck them together and pierced two holes in it to look like a button. To this I then tied a bow through it using some paper cord in a similar colour to that being used on my card.


To finish off I added a touch of color to the butterflies using some Niji Pearlescent Watercolors. added with a Water Brush.


Obviously you can change up the look of this card design in so many different ways - different border edges, papers, colors, embellishments and instead of stamped images you may like to use collage images and Altered Pages is the perfect place to look for these.
Danie xx
Danie, these are beautiful. I love the design and how with a color or pattern change you can use this concept over and over and each will be just as great as the last. <3
ReplyDeleteExceptional Danie, just like YOU!
ReplyDeleteI love your butterflies! Anyone would be thrilled to receive such beautiful mail art.
ReplyDelete