Yesterday was International World Peace Day, so I thought I would share a little Love for my post today!
I grabbed a selection of items as a starting point all of which are available from Altered Pages.
This included a selection of neutral toned patterned papers from a Authentique Paper Pad, Vintage Text Pages, Gesso, Gelatos, a Background Stamp and some Mixed Media Chipboard Die Cut Pieces. I cut some ATC Backs from a old Manilla Tab Divider. I rounded the corners with a corner rounder punch.
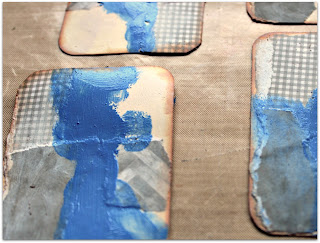
I started by tearing the papers into pieces and sticking them randomly down to my ATC backs. I then took some paint - Ocean Blue in color and with my finger randomly smearing paint over my ATC's. While I had the blue paint out I also painted one of the chip board pieces which I would later cut up and use on my ATC's.
I then with a very wet paint brush picked up a little gesso and brushed some across the ATC's.
Once my paint and gesso were dry I took some further color using Gelatos and after scribbling a little bit of color onto my ATC's smeared this in with my fingers.
I then choose one of my patterned papers and cuts some strips in random sizes and stuck them down.
Next I took a Vintage Text/Book Page and with a Red Gelato and Black Big Brush Marker drew some hearts and cut them out.
At this point I played around with placement of my elements - my heart, my chipboard die cuts and a few die cut words cut from black cardstock. I stuck them down once I was happy.
I added some faux stitching - small dashes around the edges of one ATC and inked the edges of each ATC with Black Ink.


Love the LOVE!
ReplyDeleteI like all the layering and the chip board pieces!
ReplyDeleteFantastic ATCs, Danie. I love the way each of the colors pop.
ReplyDeleteDanie, these are terrific! Love all the effort you put into the little masterpieces!
ReplyDeletethese are absolutely wonderful. may every day be a love day! xo
ReplyDelete