Hello everyone! If you ask parents of school-aged children they might tell you that summer is almost over. After all, school will be starting soon if your local district hasn't already begun. As autumn draws closer, I think of the fall vegetable and fruit harvests. It's my favorite season and I look forward to the fall colors and cooler temps. I've tried to capture some of that in my card today.
My base panel started with an old page of sheet music. My tip to you when you are making your own background design is to start with a piece larger than you will need. This gives you some wiggle room when your are adding textures.
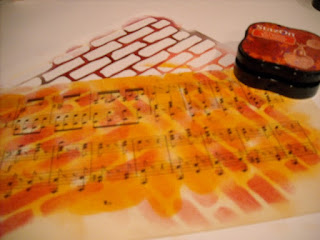
It's a fall card, so I grabbed the orange ink and a sponge and just added some color at random. Then I sponged on some red bricks using a stencil.
The second stencil I used has several different shapes on it and I used a different color ink for each one. I also used a little gesso for the white circles. Gesso is a little thicker than ink and it stands out really well in the colorful pattern.
Here are the two halves of the page side-by-side.
Choose where to cut your panel by which part of the background you want to highlight. I chose to have the large white circle on the right because it plays well with my collage image. My little grape harvester is wearing a pretty white peasant top. Inking the edges frames the design and helps bring it all together as a single piece and gives it a more finished look. The same ink was sponged around the picture of the little girl.
The collage image is mounted on cardstock and attached with foam squares so that the card isn't just flat. I added a few paper flowers and some Dew Drops in the same basic color scheme as the background. There is still plenty of space to add a sentiment later...or not.
My base panel started with an old page of sheet music. My tip to you when you are making your own background design is to start with a piece larger than you will need. This gives you some wiggle room when your are adding textures.
It's a fall card, so I grabbed the orange ink and a sponge and just added some color at random. Then I sponged on some red bricks using a stencil.
 |
The collage image is mounted on cardstock and attached with foam squares so that the card isn't just flat. I added a few paper flowers and some Dew Drops in the same basic color scheme as the background. There is still plenty of space to add a sentiment later...or not.
Supplies used:
Sheet music paper, cut to size
Card stock
Come back again and see what other projects the Altered Pages Design Team has to share with you!


gorgeous! xo
ReplyDeleteRobin, this is a masterpiece! Absolutely lovely! Thanks for sharing it with us all.
ReplyDelete