Who said Dixie Belle paints are only for furniture? I love pushing products and using them for unintended media! So today I have taken my Dixie Belle Paints scrapbooking...
I have a lot of pictures I took on a quick weekend trip with my mother, aunt & uncle a couple of years before my mother left us. I have been creating an small keepsake album of 6x6 pages for my aunt & uncle! This page is of a beautiful memorial we passed while walking through town. On the bench is says '' Greater love hath no man than this. That a man lay down his life for his country."
My page has stamping & painting, these techniques could also be used on cards!
On this page I have a "focus shot" of the face of the statue. Learn more about focus shots on my earlier post "A Little Birdie Told Me" HERE!
Supplies:
Dixie Bell Paint - Flamingo
Dixie Bell Clear Coat
Corrugated Cardboard
Circles Background Stamp
Brown Ink
Graphic 45 Secret Garden 6x6 Paper Pad - Green
Petaloo Flowers
Silk Leaves
Brown Cardstock
Pictures
Burlap strands
Double Stick Tape
Dew Drops
Tacky Glue
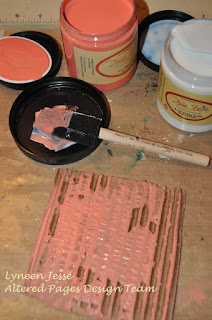
I didn't want full coverage with the Dixie Bell Paint - Flamingo on the Corrugated Cardboard so I mixed it with the Dixie Bell Clear Coat.
I applied a light coat of paint and let it dry.
While the paint dries, stamp the green sheet of paper from the Graphic 45 Secret Garden 6x6 Paper Pad. Use the Circles Background Stamp with Brown Ink. Stamp several times until the page is covered.
When the paint dries attach the Corrugated Cardboard with Double Stick Tape. Mat the pictures on brown cardstock and adhere with the double stick tape.
Add a little painted highlight around the edges of the page!
In the lower corner add burlap strands tied together, Petaloo Flowers and Silk Leaves with Tacky Glue.
Finish the page with a few Dew Drops.


Comments
Post a Comment