
Join me in shaking off those winter blues, cabin fever, or nostalgic mourning, for passing celebrities, with some magic from our February Partner; Faerie Song Rubber Art Stamp.

Here are the ingredients in my magical recipe:
Moon Goddess unmounted rubber stamp
Burlap
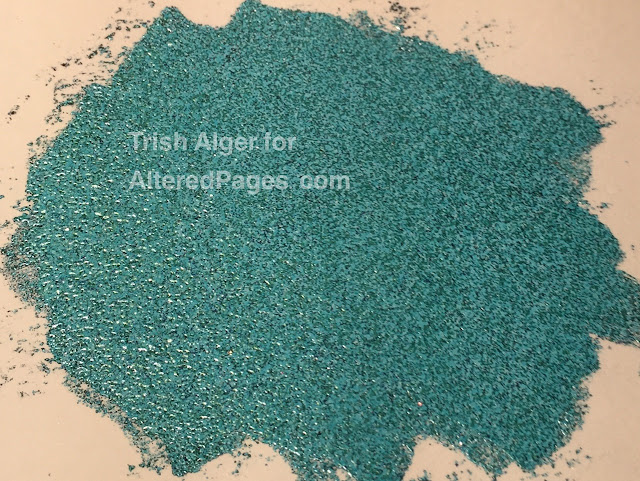
Squash Blossom Turquoise Embossing Powder
Dark Blue Pigment Ink
Aleene's Jewel It Adhesive
Sari Ribbon
Various Ribbons & Embellishments
Stickles
Vintage Chalk Paint
Glitter
Watercolor paper
Clothespin or hairclip of choice
Circle Punch or Circle Diecut (approx. 2")
Floral Diecut
Heat or embossing gun
Foam block and rounded edge chopstick
Let's ink up:
with our Moon Goddess unmounted rubber stamp image with Dark Blue Pigment Ink . Prepare to emboss. I use watercolor paper (just a piece of 140# that I had) since it can handle the work I put it through. Rub some ink in about a 2" area for embossing as well. The dark blue allowed the turquoise color to pop.

I was hooked on embossing from the first moment I watched that pile of powder melt into a beautiful enameled image.
Squash Blossom Turquoise Embossing Powder is one of the prettiest I've seen. It has a beautiful grain similar to turquoise.
I cut the embossed image and another larger circle out of the mass I also embossed.

I like to dome-out my image (another reason I like watercolor paper), and I use what's handy to me for doming.
Foam block and a rounded chopstick.

I felt the need to stack so I went to my trusty bundle of Burlap to diecut large flowers. (FYI, the burlap likes to unravel, so use at least a 2-3" size). Set aside for now.

Now to embellish the edges of my image. I love the Sari Ribbon
Using the Aleene's Jewel It Adhesive I glued the ribbon the edge of the back.

Here it looks from the front.

I knew I wanted to continue the star pattern in my embellishments, so I prepped some leftover chipboard pieces. Using the Vintage Chalk Paint and Glitter it gave the sparkle I was looking for.

Now to assemble the pieces.
The base, using Aleene's Jewel It Adhesive :

The next layer:

Time to add the Various Ribbons & Embellishments to add interest. I try hide the ends in the middle.

Here's where we are so far:

I'm going to add my clothespin to the back and add Stickles to the stars on my embossed image.

After they both dry, I can adhere the image to the front and add my stars (I used the roll of paper to brace the ribbon while it dries):

Now for the fun! I had 2 models with great hair colors to model. (Both are my lovely daughters).
Vanessa:

Kimberly:

Just think of all the lovely hair bobs you could create. Now get in there and stamp away your winter doldrums!
I just loved working with the Moon Goddess unmounted rubber stamp from our February Partner. Stop by and tell them hi!

If you enjoyed this post, please comment below and let us know you were here. Don't miss the creative inspiration that the AlteredPages.com Design Team loves to dream-up, just for you!!
Ciao for now,
-Trish


Here are the ingredients in my magical recipe:
Moon Goddess unmounted rubber stamp
Burlap
Squash Blossom Turquoise Embossing Powder
Dark Blue Pigment Ink
Aleene's Jewel It Adhesive
Sari Ribbon
Various Ribbons & Embellishments
Stickles
Vintage Chalk Paint
Glitter
Watercolor paper
Clothespin or hairclip of choice
Circle Punch or Circle Diecut (approx. 2")
Floral Diecut
Heat or embossing gun
Foam block and rounded edge chopstick
Let's ink up:
with our Moon Goddess unmounted rubber stamp image with Dark Blue Pigment Ink . Prepare to emboss. I use watercolor paper (just a piece of 140# that I had) since it can handle the work I put it through. Rub some ink in about a 2" area for embossing as well. The dark blue allowed the turquoise color to pop.

I was hooked on embossing from the first moment I watched that pile of powder melt into a beautiful enameled image.
Squash Blossom Turquoise Embossing Powder is one of the prettiest I've seen. It has a beautiful grain similar to turquoise.

I cut the embossed image and another larger circle out of the mass I also embossed.

I like to dome-out my image (another reason I like watercolor paper), and I use what's handy to me for doming.
Foam block and a rounded chopstick.

I felt the need to stack so I went to my trusty bundle of Burlap to diecut large flowers. (FYI, the burlap likes to unravel, so use at least a 2-3" size). Set aside for now.

Now to embellish the edges of my image. I love the Sari Ribbon
Using the Aleene's Jewel It Adhesive I glued the ribbon the edge of the back.

Here it looks from the front.

I knew I wanted to continue the star pattern in my embellishments, so I prepped some leftover chipboard pieces. Using the Vintage Chalk Paint and Glitter it gave the sparkle I was looking for.

Now to assemble the pieces.
The base, using Aleene's Jewel It Adhesive :

The next layer:

Time to add the Various Ribbons & Embellishments to add interest. I try hide the ends in the middle.

Here's where we are so far:

I'm going to add my clothespin to the back and add Stickles to the stars on my embossed image.

After they both dry, I can adhere the image to the front and add my stars (I used the roll of paper to brace the ribbon while it dries):

Now for the fun! I had 2 models with great hair colors to model. (Both are my lovely daughters).
Vanessa:

Kimberly:

Just think of all the lovely hair bobs you could create. Now get in there and stamp away your winter doldrums!
I just loved working with the Moon Goddess unmounted rubber stamp from our February Partner. Stop by and tell them hi!

If you enjoyed this post, please comment below and let us know you were here. Don't miss the creative inspiration that the AlteredPages.com Design Team loves to dream-up, just for you!!
Ciao for now,
-Trish

Thanks for the detailed instructions. You're so creative!
ReplyDeleteThank you Robin, I appreciate it.
DeleteI love the hair bob you created. Going to give it a try for my granddaughters :)
ReplyDeleteI love the hair bob you created. Going to give it a try for my granddaughters :)
ReplyDelete