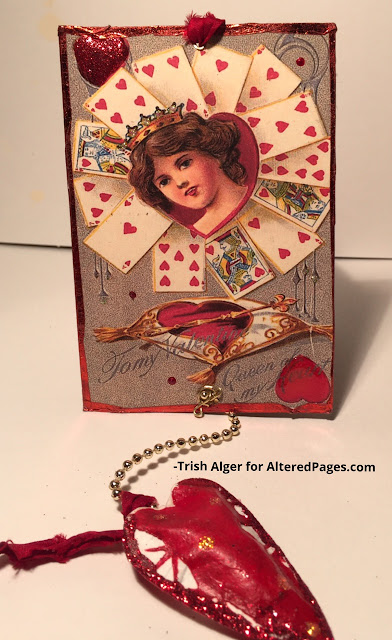
Queen of My Heart Dangle


Vintage images offer a wonderful jumping-off point for crafting fun. 
For this project I chose:
Queen of Hearts collage  
Red shiny foil tape  
Red paint   
Mediums for texture  
Glitter  
Sari ribbon  
Aleene's Tacky Glue  
Dimensional adhesive  
Trim for dangle   
Stencil for heart dangle  
Stickles  
Beaded chain, cord, or twine  
Watercolor paper
Eyelets-1 small and 1 large
Small bit of wire

I chose the 2 images I wanted to use and added glaze, glitter and Stickles to each panel. Set aside to dry.


Then I worked on the heart dangle.


I used a stencil I liked and mixed gel medium and the Art Anthology paint I chose; scraped it over the stencil onto watercolor paper and set it aside to dry. 

Once the panels were dry, I adhered them back to back and added the red foil tape to the edges. Holes were punched top and bottom and eyelets set. 
I used some plastic beading to hang the dangle. I fashioned a small piece of wire to hold it inside the bottom eyelet.


The heart dangle was cut from the watercolor paper and "domed" to make it look puffy. I used a foam block and the rounded end of a chopstick on the backside to push-out the form. Watercolor paper is sturdy and very forgiving when manipulated.


To keep the entire piece together, I used these awesome dimensional squares in the middle.  I stacked up 4 squares high and 2 wide, and pressed the wrong side of the hearts together. 


Aleene's Tacky Glue was placed around the edges. (Leave a small opening at top for the chain). I used some tiny binder clips to hold it while it dried.


Once dry, the beaded chain was glued into the open top of the puffy heart. 


I added glitter around the edges and Stickles to accent. 


Sari ribbon  was tied to the dangle heart and to the top of the image through the eyelet for hanging.


Browse the images available to personalize your own Dangle.
Thank you for allowing me to share. -Trish Alger  


Comments

  1. Terrific project! Love how you challenge us all to be extremely creative. Take the usual and make it unusual!

    ReplyDelete
  2. Thanks for the little tutorial - I'm going to try this out for some of my Valentine projects!

    ReplyDelete
  3. Beautiful card! The puffy heart is fun♥

    ReplyDelete
  4. Super cute. Everything is better with dangles! :-)

    ReplyDelete

Post a Comment

Popular posts from this blog

Get on Over!

We like having you visit,  Make sure to subscribe... Just click here - easy peasy November will be filled with Die Cut ART,  join us. Embellish premade pieces art by Barbara Rankin Cut your own pieces Paint or Foil to add interest art by Lyneen Jesse Combine Die cuts in a variety of mediums art by Jean Moore Create with your manual die cutting machine  or buy premade
 Handy Tip for Artists, Recyclers and Neat Freaks! I have a follow-up to the Citra-Sol method for creating fabulous background pages and collages.   I bought a big bag of navel oranges and realized I had the ingredients to make my own solvent!   Simply take a clean glass jar, peel the rind from the oranges and place all the rind/peels, without the pulp (tangerines, oranges, navels) into the jar.   Pour enough vinegar over the peels to cover them.    Allow the jar to sit for a week or two and VOILA!     You have made your own solvent for literally pennies.    You will notice the liquid getting a bit thicker than the plain vinegar and it does not smell bad!!! I now have a  HUGE jar on the window sill!       Be careful and only use this after testing on a safe spot.

Full Circle

Hi all! Becky here today! I have been in a circle-mood lately & have been doing circles on everything! So why not do some circles with some of my Gelli Prints??? Here's a simple little card I made using 4 different circle punches, a black pen & some previously made Gelli prints! Hope you're enjoying Springtime in your area! Cheers!