
Welcome back friends. Today I have the final phase from my Winter Wonderland Ornaments from a couple weeks ago. You can find Part 1 here. To do a short recap I used the Black Plus Air Dry Clay from ACTIVA and fun embellishments from Alteredpages.com to create snowflake and star shaped ornaments. Please take a minute to check out both sites for an abundance of supplies and inspiration.
I have to tell you I really had a great time working on this post and as promised I had my daughter Gabriella help out on the "personality" phase of the ornaments. We had a good old time staying up late drinking hot chocolate and making art and memories!

With this project, once the clay ornaments were created using the cookie cutters (that information is in part 1, link above) it was painting, painting and more painting with ribbon, glitter, and bling added in the final stages.
Taking a look back at how they started...


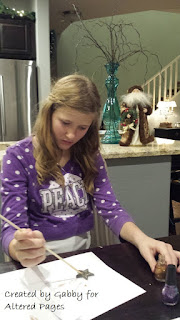
Painting has begun...

Here Gabby is getting in on the fun. Most of these were painted using different colors of craft paints. For some of the ornaments, though Gabby actually used nail polish. She really loved some colors she had as well as they little brush. She applied detail on a couple using a wooden kitchen skewer.


Then, I started on the large snowflakes. These are about 3 to 4 inches...so not a petite ornament. The base color that I chose for these was a pale China blue. It took a few coats to achieve the intensity that I wanted.

More layers being added.

Here the snowflakes are getting an additional layer of pearly white. The pictures just don't do them justice.

Here are a few of the cute little stars.
These will be given as teacher gifts and little extras here and there. I just love how they turned out. Gabby will be sure to sign and date the backs of the ones she did as well.


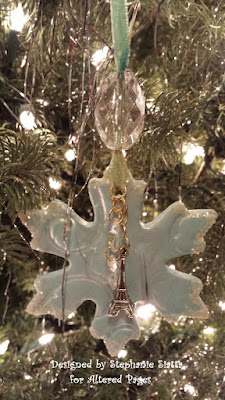
Here are the snowflakes with final coats of iridescent paint, charms, crystals and glitter. Then they were hung with pretty dyed ribbons and large bobbles. The charms were added by using simple jump rings threaded right onto the ribbon prior to knotting it.


Aaaaannnddd, here they are hung in our Christmas tree in all their glory. They are just so pretty. I know I've said it before (in this post even), but the camera just does not capture all the dimension and sparkle.


I do love this shot in low light, though...it does capture some of the feel...

Thanks much for stopping by. Gabby and I hope you enjoyed our ornaments. We sure had fun making them. I already promised Gabby that we will be making more. The air dry clay was so easy to work with...much easier than making sugar cookies and no calories! :-)
I won't be posting again until January. So, I will take this opportunity to wish you all the Happiest of Holidays and Peace in the New Year!
Have a wonderful weekend and thanks again for stopping by.
~ Stephanie and Gabby
Many thanks to ACTIVA and Altered Pages for such great goodies to choose from.
Here are the supplies I used.
NIJI Paints - for the iridescent look
Aleens Jewel-it for applying glitter
cookie cutters
jump rings
crystals
These ornaments are dreamy! Love the colors and the shimmer. Gabby's teachers will be thrilled. Stamping them created such beautiful texture to catch the shimmer too.
ReplyDeleteThese are amazing. I love the shimmer and the colors you used are just gorgeous! Hmmmm, thinking I may have to make some myself. LOL
ReplyDelete