Hope you had a wonderful day yesterday! Am I crazy or did the year go by faster than the last?
Every year I promise myself I will start my shopping earlier, write my cards Thanksgiving weekend, bake cookies, the decorations up at least 3 weeks before the big day. Maybe next year!
For now it is back to creating! Hot air balloons are one of my favorite things to create. Hope you enjoy this tutorial as much as I did creating it.

A quick review on how to make the balloon!

Supplies you will need: Activa Ridge Wrap, scissors, balloons (small water balloons), container for warm water, protective cover for table.
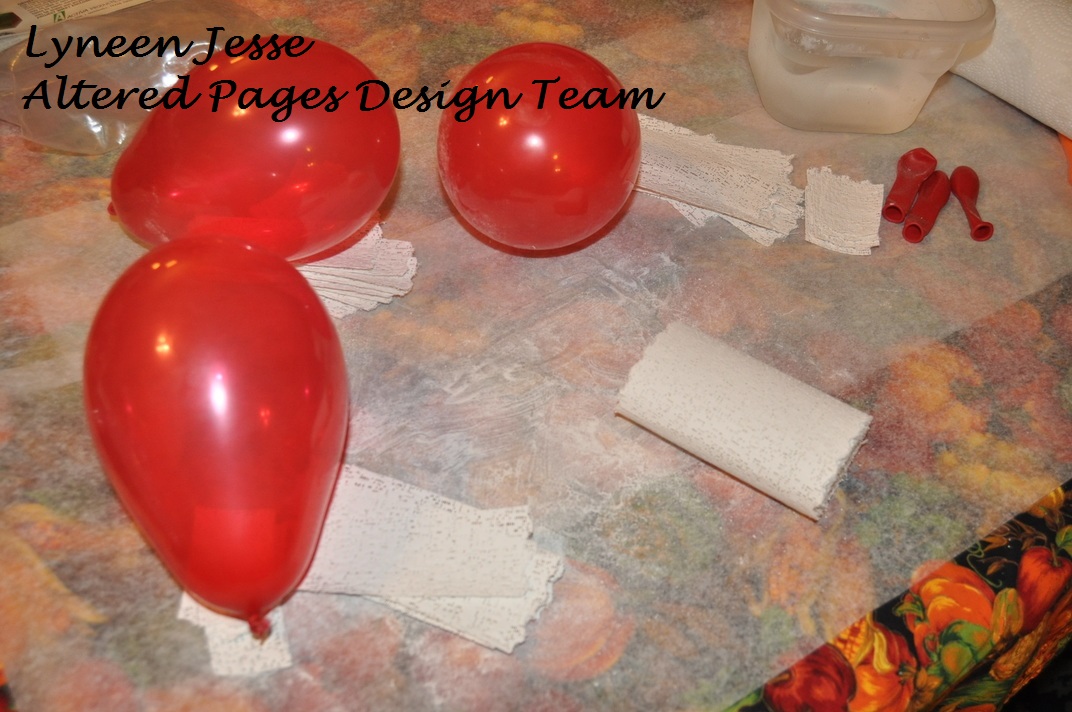

Cut Ridge Wrap into strips (about 1 1/2 x 4) and blow up balloons... you are now ready to start applying Ridge Wrap. Wet Ridge Wrap thoroughly in the bowl of warm water, remove excess water. Slightly overlap each piece as you add them to the balloon. When applying, rub the Ridge Wrap to help close the plaster holes in the wrap.


Apply the first layer of Ridge Wrap in one direction. No need to let is dry before applying the second layer. Apply the second layer in a different angle to create a stronger structure.


When finished applying Ridge Wrap set aside to dry. The wrap begins to harden within minutes. In about 30 minutes you can remove the balloon.

Snip a little hole in the balloon and watch it will release from the sides. Remove the balloon and let dry over night. One package of Ridge Wrap (roll 4" x 180") was able to make 3 small balloons.

NOW TO FINISH THE BALLOON

To create the text balloon cover it with vintage text from Altered Pages! Strips of Vintage Text Papers were torn in strips approximately 1/2 inches. For the length of strips: measure from the top of the balloon to the bottom add about an inch.

Using a non-food dish pour Tacky Glue and water it down... with a paint brush apply to the dry Activa Ridge Wrap balloon.

Starting at the top center apply strips of vintage text, tucking about 1 inch inside the opening of the balloon, over lap each strip as you add them.


Once the balloon is covered set it aside to dry!

Add trims to the balloon with Tacky Glue, when adding the trims be sure to add a hanger from the top center of the balloon.

Make a small box for the balloon basket. Paint it with acrylic paints, dry. When dry punch small holes in the corners and put the light bulb pins through the holes. Add Petaloo Burlap flowers to the basket.

Punch banner flags from contrasting papers in the Laced with Grace paper pack, add Dew Drops to each flag, attach flags to lace.


Tie twine to hold the basket: one piece around the top of the balloon and four pieces about a yard each to attach to the basket.

Once the twine has been tied off to the basket, attach the lace with banners to the balloon, add feathers and burlap flowers to the top.


Activa Ridge Wrap
Water
Container for warm water
Small balloons
Scissors
Protective cover for table
Vintage Text
Tacky Glue
Paint Brush
Acrylic Paints
Trims & Twine
Glitz Laced with Grace Paper Pack
Dew Drops
Petaloo Burlap Flowers
Light Bulb Pins
Lace

Oh, I love this so much! I just adore hot air balloons - and this one seems like one that even I could achieve. And I just received some Sari ribbons in an order for Altered Pages - I didn't know what to do with them, but now I know!. Now I just have to order the Activa stuff.
ReplyDeleteThanks so much for the inspiration! I'm definitely psyched to make one myself!
Hope your holiday was merry!
p.s. I just checked Alteredpages.com - and they don't carry it. Where do you find Activa Ridge Wrap?
ReplyDeleteHere you go Tristan: http://activaproducts.com/products/4-x-180-rigid-wrap-plaster-cloth
DeleteLyneen,
ReplyDeleteLovely balloons, now I want to create one. Great idea for a gift basket.
-Trish
A great collection of balloons for a flight while you are 'Dreaming of Castles'.
ReplyDeleteAnother beautiful balloon, Lyneen!
ReplyDeleteThese are super fabulous, Lyneen! I have some of that ridge wrap, and this looks like it might be what I will use it for! Thanks for the inspiration.
ReplyDelete