
The challenge; to create fabulosity. The object; Smeared Ink Steampunk Grumpies Tophat Digi Stamp! There was no limit to the possibilities! I printed, I scanned, I Photoshopped, I made rub-ons, and (my unfavorite) I fussy-cutted.


TopHat Gift Bag

First up a sweet little card that manages to channel Autumn and the Christmas season all at once.
TopHat IX Card
Smeared Ink Steampunk Grumpies Tophat Digi Stamp
Ranger Ink Dylusion Sprays
Print Your Own Rub-on
Colored Cardstock and Watercolor Paper
Assorted Ephemera, Markers, Adhesives, and rub-ons

(Cards vs. junk mail. Personal handmade cards win every time.)
TopHat Tagged
Smeared Ink Steampunk Grumpies Tophat Digi Stamp
Ranger Ink Distress Inks
Print Your Own Rub-on

(Wonderful bookmark idea.)
TopHat Matchbox
Smeared Ink Steampunk Grumpies Tophat Digi Stamp
Kraft Paper Matchbox Blank
Print Your Own Rub-on

(Don't need matches? Great for a tiny gift box.)
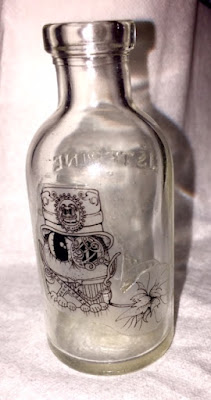
TopHat Bottled
Smeared Ink Steampunk Grumpies Tophat Digi Stamp
Print Your Own Rub-on
Antique Listerine Bottle
Lacquer for adhesive
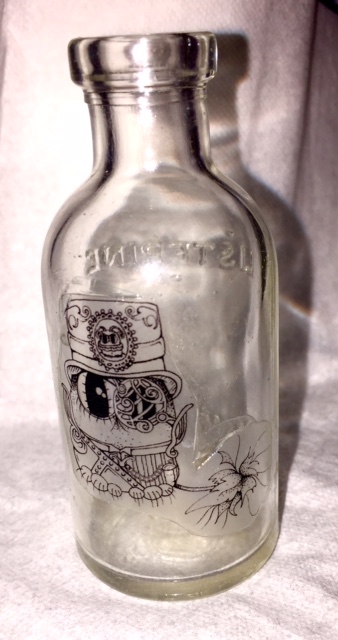
(Why did I make this? It made me happy--always a good choice.)
TopHat
Smeared Ink Steampunk Grumpies Tophat Digi Stamp
Print Your Own Rub-on
Assorted Ephemera, Gold Pen, and adhesives.

(Tuck in a few Christmas photos.)
TopHat Banner
Smeared Ink Steampunk Grumpies Tophat Digi
Print Your Own Rub-on
TCW Gears Mask
Acrylic Gel Mediums, markers, and adhesives

(Thanksgiving--Steampunk style!)
TopHat "T"
Smeared Ink Steampunk Grumpies Tophat Digi Stamp
Cotton white T-shirt

(Already have an order from the daughter for one!)
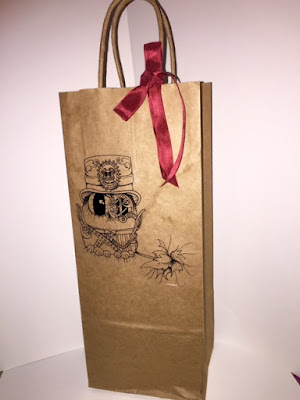
TopHat Gift Bag
Smeared Ink Steampunk Grumpies Tophat Digi Stamp
Paper Gift Bag

(Recycling at its best!)
Lots of ideas for ONE digi stamp Smeared Ink Steampunk Grumpies Tophat in all sorts of sizes; even flipped horizontally!
I'd love to see what you can do with TopHat, or perhaps one of many digi stamps offered by our November Product Partner Smeared Ink
Let me know what you think of the plethora I have shared today or by our other fabulous designers on this blog.

Happy crafting!
OMG!!! What an amazing number of fabulous projects you've made with this adorable digi. Would love to know how you made your own rub on. xxD
ReplyDeleteThis comment has been removed by the author.
DeleteThank you Donna. I used a product that can be fed through an ink jet printer. Amazon even has it. It's called a rub-on but seems like a clear sticker when applied. Real easy to use though, just follow their directions. Enjoy!
DeleteTrish, wehen we asked you to create, you took us SERIOUSLY! Fabulous art!
ReplyDeleteHaha I guess that is true Jean. I just loved this little guy and I wanted to see what he could do. Thank you for this opportunity!
DeleteWow you are one busy lady Trish and so many different takes on one design! Great job!
ReplyDeleteThank you Tonya, I was on a roll I guess.
DeleteTrish, these projects are really creative. It looks like you had fun with this little guy!!
ReplyDeleteThank you Robin, I did. He is so cute.
DeleteSo much fun way to go, Trish! :)
ReplyDeleteThank you Trisha. It was fun.
DeleteI can't believe how many amazing gorgeous and whimsical projects you made with this one image. very inspiring to see! xo
ReplyDeleteThank you Michele, that was my goal; to see how many ways I could use one image.
DeleteWow Trish all of these projects are fun and fabulous, love how you have shown numerous ways to use one stamp. xx
ReplyDeleteThank you Danie, I appreciate that.
Delete