
Hi everyone, it's Robin here today. The start of school means the task of wrapping each book to begin the school year. My mother used to save up brown paper bags over the summer so that she had enough large paper to do the job. They were sturdy and gave me an awful lot of room to doodle, but they sure weren't pretty. I bought a roll of plain white wrapping paper last year from a school fundraiser and today I'm using that as the base of my project.

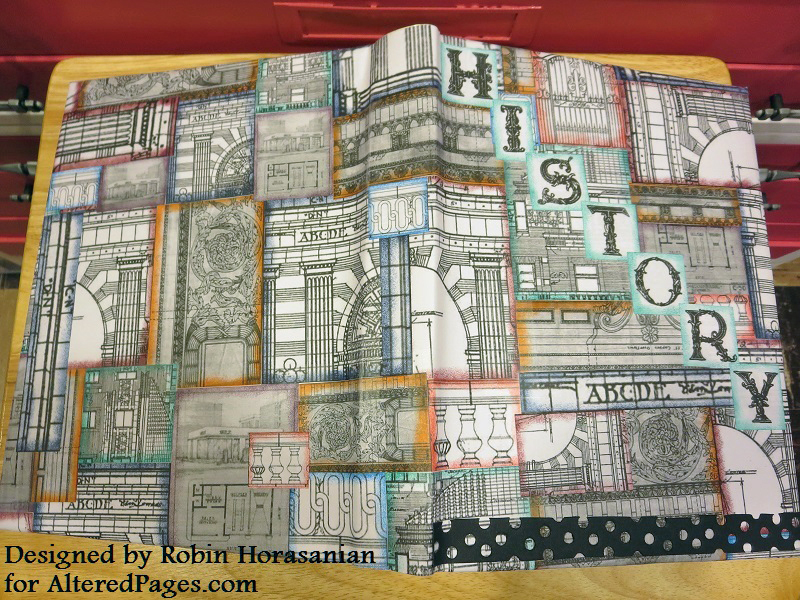
I cut a sheet of paper large enough (okay, I cut it way too large) to cover the history book. I chose two different sheets of architectural collage images from Altered Pages and printed them in as full page, 5x7 and 4x6 sizes. I chose black and white images for a reason. Each page of images had several square images so I cut each square and inked the edges of each one just to give the book cover a hint of color. I kept the color consistent for each individual image regardless of size. The letters were freehand-cut and then inked.

Schoolbooks get handled a lot so you’ll need a pretty strong glue to attach your images to whatever paper you use for a base, whether you choose grocery bags, wrapping paper or store bought book covers. If you have any edges that are giving you a hard time, either tape them in place or simply glue another image or embellishment over that spot. I chose to keep these books flat so that they would stack well together on a shelf as well as in a backpack. There are so many different embellishment choices at Altered Pages that you can be as creative as you choose!
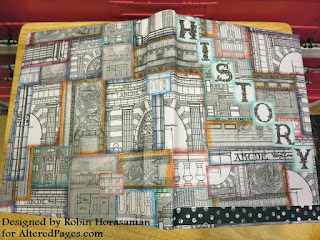


Oh, you want to know why I chose black and white images. If your child is anything like me, these buildings will all be colored in by semester break.

Project supplies:
Vintage Architecture collage sheet
Architechtural Drawings collage sheet
15th Century Alphabet collage sheet
StazOn midi ink pads
Dauber
Thin double-sided adhesive
Black Bazzill Border
Glue Sticks or other adhesive
Seemingly Endless Embellishment Opportunities

Stop by tomorrow and see what project inspiration the Altered Pages Artsociates team has for you. Until then...Happy Crafting!

I cut a sheet of paper large enough (okay, I cut it way too large) to cover the history book. I chose two different sheets of architectural collage images from Altered Pages and printed them in as full page, 5x7 and 4x6 sizes. I chose black and white images for a reason. Each page of images had several square images so I cut each square and inked the edges of each one just to give the book cover a hint of color. I kept the color consistent for each individual image regardless of size. The letters were freehand-cut and then inked.

Schoolbooks get handled a lot so you’ll need a pretty strong glue to attach your images to whatever paper you use for a base, whether you choose grocery bags, wrapping paper or store bought book covers. If you have any edges that are giving you a hard time, either tape them in place or simply glue another image or embellishment over that spot. I chose to keep these books flat so that they would stack well together on a shelf as well as in a backpack. There are so many different embellishment choices at Altered Pages that you can be as creative as you choose!

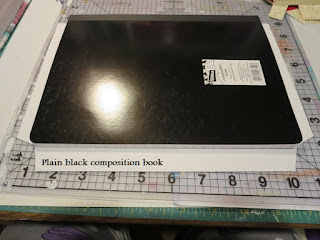
Composition books all look the same. Why rummage around in the backpack looking for the right one? I made a cover from a sheet of computer paper to match the history book. No more guessing which books are for which class.


Oh, you want to know why I chose black and white images. If your child is anything like me, these buildings will all be colored in by semester break.

Project supplies:
Vintage Architecture collage sheet
Architechtural Drawings collage sheet
15th Century Alphabet collage sheet
StazOn midi ink pads
Dauber
Thin double-sided adhesive
Black Bazzill Border
Glue Sticks or other adhesive
Seemingly Endless Embellishment Opportunities
Stop by tomorrow and see what project inspiration the Altered Pages Artsociates team has for you. Until then...Happy Crafting!
This is terrific - I love making book covers! Here's a composition book I covered using mostly Altered Pages 'stuff' ...https://www.zibbet.com/enchanted-revelries/shabby-chic-victorian-style-hardcover-journal
ReplyDeleteTristan, your composition book is every little girl's dream! I love it.
DeleteYour detailed work is always the most amazing! We need to feature you again!
DeleteThis brings back memories of when my teachers would have us cover our books as a grade and sometimes for a prize. Great idea!
ReplyDeleteI am so lovin this creation! I enjoy that it gives someone the opportunity to make it their own with coloring or adding words as they go along. Makes it truly personal. THANKS Robin for allowing us to get smarter!
ReplyDeleteI am so lovin this creation! I enjoy that it gives someone the opportunity to make it their own with coloring or adding words as they go along. Makes it truly personal. THANKS Robin for allowing us to get smarter!
ReplyDeletefantastic! almost makes me want to go back to school! xo
ReplyDelete