It's Friday Again! Yesssss! I'm so glad you are still traveling the great USA with us here at Altered Pages!
I am happy to share with you a WIP that is actually done. I, like many of you, have multiple WIP's that just seem to never leave that status in their lives...they just hang there in WIP limbo, well not this time.
I am sharing with you a layout featuring a photo of my daughter that was taken while we were in Kauai a couple years ago. This is probably one of my most favorite pictures of her. She was just so at home on this trip. She really felt and lived Aloha every moment while we were there and really still does when I stop and think about it. She longs to go back and working on this page has given me the Hawaii bug as well.
Okay, enough talking and on with the project. Oh, be sure to comment letting us know you were here so you can be entered in the Altered Pages drawing for free prizes!
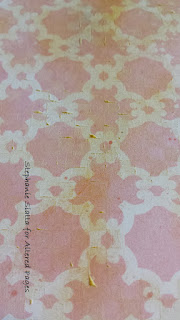
Below you can see that I began my adding some texture to my 12x12 KaiserCraft paper. The pale coral color of this paper just seemed like the right backdrop for the colors in my photo and especially the collage sheet that I planned on using as well. The first photo's are a stamp and gesso resist technique where I painted gesso right on my stamp and then applied it directly to the paper. The stamp was a checkerboard background style stamp. I then added some gold under tones using my gold PanPastel. I randomly and progressively added the extra color to the page. The pictures don't really do it justice. In person you can see the texture and the gold hue is pulled forward with the gold of the collage images...you will see that later.
Next, I wanted to add some real dimension using paper and silk flowers, which you can find here and here, and a little finishing touch with Dew Drops. I needed to get that going so it would dry while I worked on other aspects.
I guess with all the excitement I forgot to snap a pic or two of the collage sheet transformation. I did get this one photo though, I tore the edges of my Blue Hawaii collage images and gave them just a kiss of color on the edges with my NIJI Paints. I often edge out images with an ink pad. This time I thought why not use colors that coordinate perfectly with the colors in my collage sheet. My waterbrushes along with the Niji metallic paint palette worked perfectly for this. Here you can see the before and after.
If you look closely at all of the collage images in this photo below you can see the added colors of copper, blue, green and gold pulling out the colors of the beautiful collage sheet images.
Which, brings us to the final project...my pretty little hula girl. I hope you enjoyed this post. I hope that through the amazing Altered Pages Design Team's vision while crisscrossing the US of A this this month you are inspired to take a trip of your own. Make sure you take along your Portable Art Pack wherever you go! Check out the supply list below for all that you might need to make a beautiful layout of your own.
Thanks for stopping by! ~ Stephanie


Darling, of course with my favorite topics!!! love the flowers.
ReplyDeleteGreat flower technique!! I like your differnt shape layers. They are adorable.
ReplyDelete