Hello everyone, and welcome back to my regularly scheduled post. As you know by now, we are featuring products from this month's fabulous sponsor, MD Hobby & Craft. The design team has been making some wonderful projects for you that should really get those creative juices flowing.
I have been trying to figure out ways to display some of my artwork in my studio to give me my own inspiration and, hopefully, get my creative juices flowing. When I received this 1' x 2' Lincane Perforated Aluminum Sheet, oh boy did the ideas start coming. I made this magnetic memo board with other supplies I had on hand, just waiting for the perfect project.

Print the two Altered Pages collage sheets listed in the supply list below onto Craft Attitude (CA). I suggest doing this first to allow the ink to dry on the CA sheets. Remember to reverse the images for printing if you have any words on anything.
Insert 12"x12" Magnetic Steel Sheet into memory frame, check fit. The perforated aluminum sheet that I am using on top is not magnetic, so I need this second piece beneath it to make it magnetic.
 Run a strip of washi or painter's tape around the edges of the frame to protect it from painting. Sponge on Copper acrylic paint; allow to dry. You could always paint the metal outside of the frame, but I was afraid I might scratch it off by handling it.
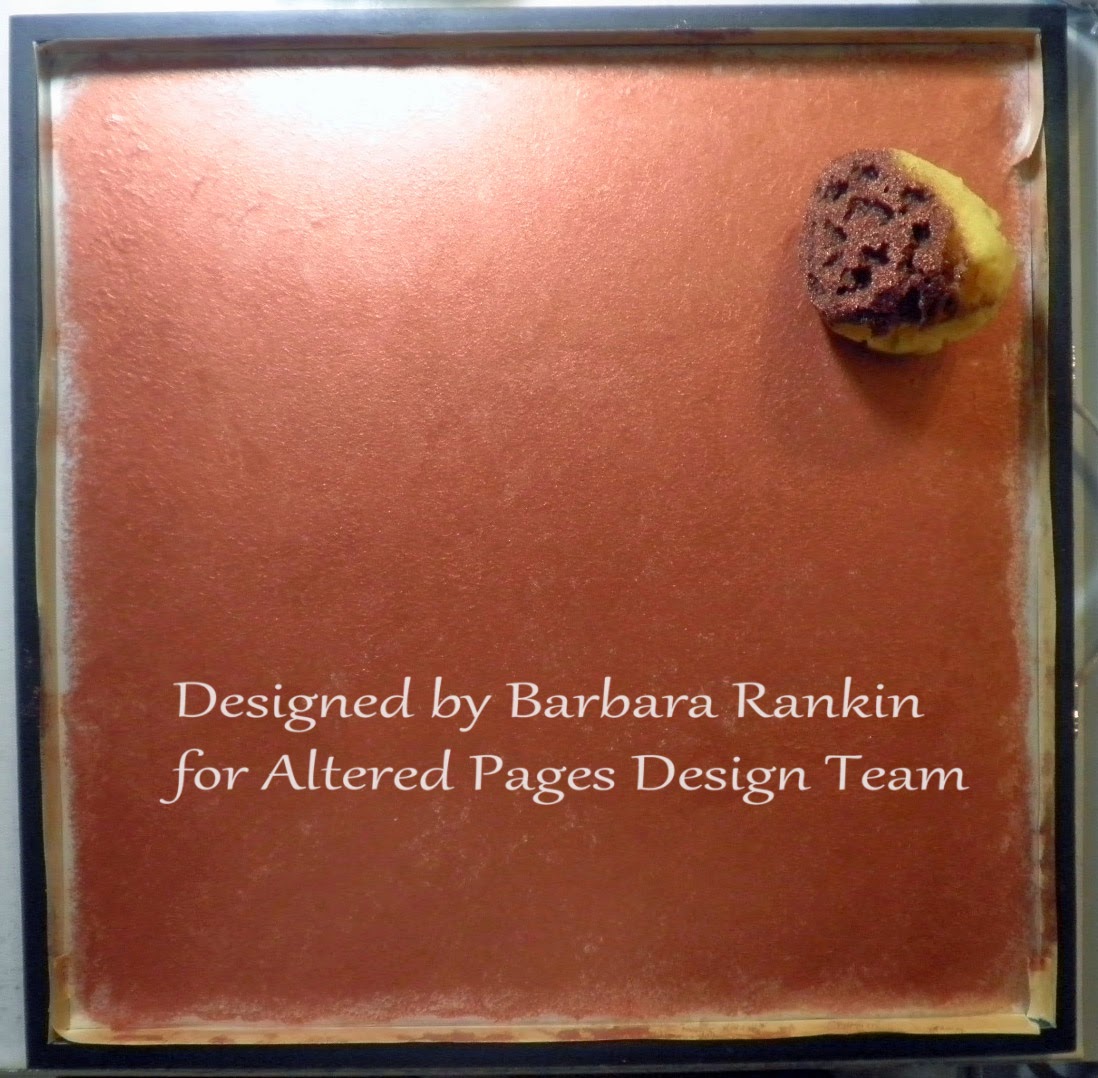 Sponge a lighter coat of the Verde Gris glaze over the Copper paint; let dry. Remove washi tape.
 Use a guillotine cutter or metal shears to cut the 1' x 2' Lincane Perforated Aluminum Sheet down to 12" x 12".
 Add a 1/4" strip of metal tape to the cut edge.
 I used to do my own framing, so I happen to have a framer's tool and points, which I used to secure my metal sheets. I know not everyone has these, so a good metal adhesive will work just as well.

Adhere Double-sided tape to five strips of German Scrap. Be sure to burnish the tape down really well. This will help it adhere better, and make it easier to get that dad gum liner off.
 Adhere the strips around the perimeter of the metal sheets to cover your glazing points (or glue), or just for the sheer elegance of it.

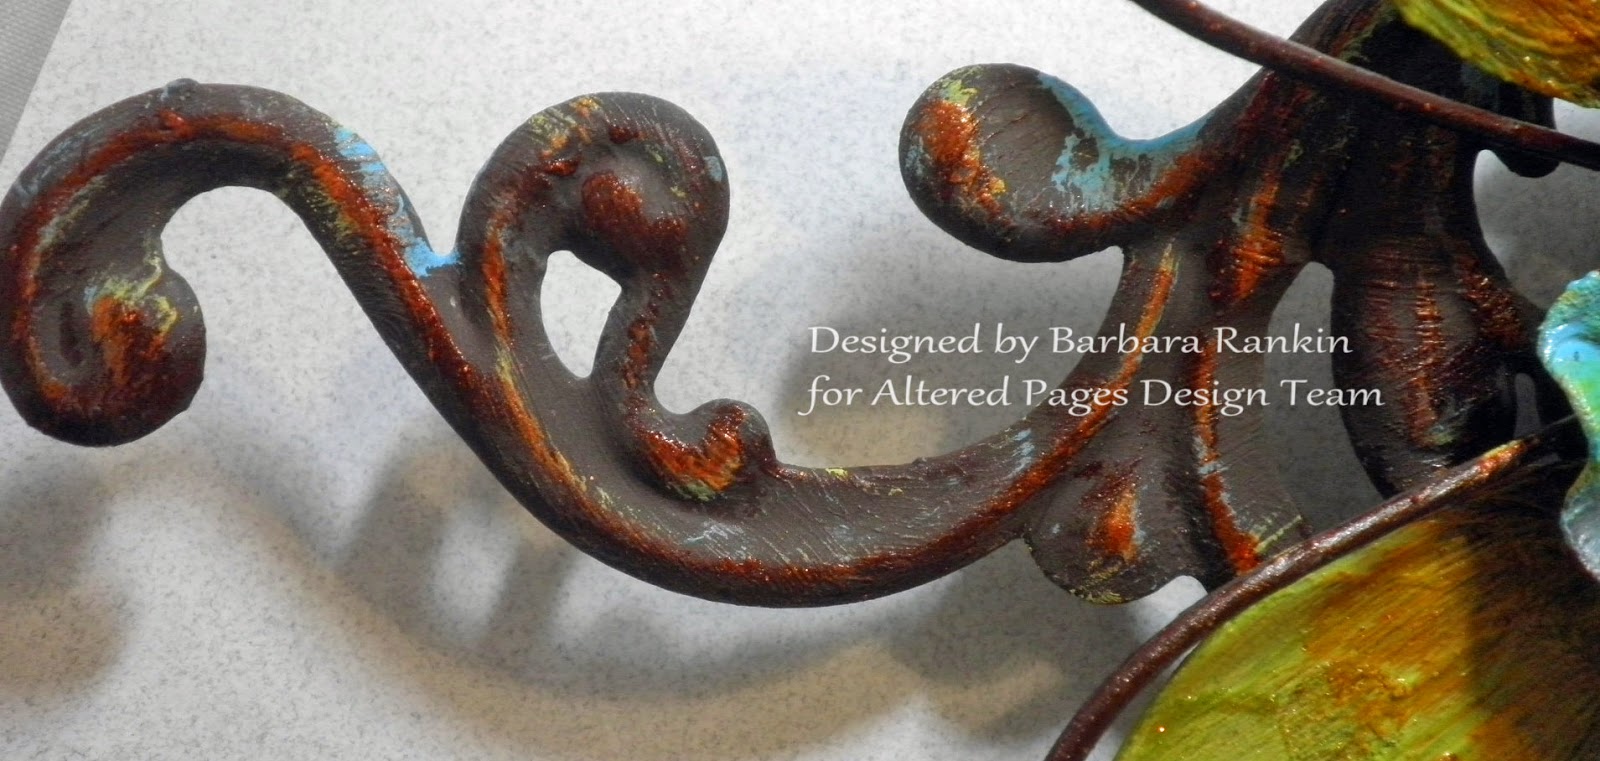
I had purchased this metal flower embellishment, but I wanted to make it my own.
 So, I used my Art Anthology Dimensional Acrylic Paints (June Bud, Baby Blue Eyes, Red Velvet, Kenyan Copper) to make it more to my liking. These paints are transparent and very thick, but I needed to make them more opaque by adding some white gesso to them.
 After that coat dried, I came back with either the same color without gesso, or added another color on top. See photo for details.


 Make a second domino from another image of paint tubes. I made a third one, ART, that I glued to several layers of mat board with a white background. Here are all three.
 A couple more pics of the metal topper...
 and the magnets in use on the board.

Supplies used:
Altered Pages: AP-2550 Create Art collage sheet; AP-2565 I Create, Therefore I Am collage sheet; German Scrap; Double-sided tape; Art Anthology Dimensional Acrylic Paints (June Bud, Baby Blue Eyes, Red Velvet, Kenyan Copper); White Gesso; Glue stick; Ranger blending tool;
MD Hobby & Craft: 12"x12" Magnetic Steel Sheet; 1' x 2' Lincane Perforated Aluminum Sheet
12"x12" Memory Frame (Hobby Lobby)
Acrylic paint: Copper, Verde Gris Glaze
Kraft colored washi tape (or painter's tape)
Sea sponge
Craft Attitude
Dominoes and Matboard
Alcohol inks: Espresso, Latte, Caramel
Alcohol, blender tool, felt
Thanks so much to MD Hobby & Craft for allowing us to "play" with their fabulous products this month. I have another fun idea in the works for my next post in a couple of weeks.
And a big thanks to you for stopping by today. I hope you will check out the rest of the team's projects this month combining these great products from MD Hobby & Craft and Altered Pages.
Have a wonderful and creative week!
Barbara
.jpg)
I have been trying to figure out ways to display some of my artwork in my studio to give me my own inspiration and, hopefully, get my creative juices flowing. When I received this 1' x 2' Lincane Perforated Aluminum Sheet, oh boy did the ideas start coming. I made this magnetic memo board with other supplies I had on hand, just waiting for the perfect project.
Print the two Altered Pages collage sheets listed in the supply list below onto Craft Attitude (CA). I suggest doing this first to allow the ink to dry on the CA sheets. Remember to reverse the images for printing if you have any words on anything.
Insert 12"x12" Magnetic Steel Sheet into memory frame, check fit. The perforated aluminum sheet that I am using on top is not magnetic, so I need this second piece beneath it to make it magnetic.
 |
| Closeup of framer's points |
 |
| Closeup of German Scrap border |
Now for some magnets to use on my magnetic memo board.
Choose a collage image from the CA sheet that will fit nicely onto a domino.
Use two to three alcohol inks with felt adhered to your Ranger blending tool to color the top and sides of a domino, let dry. Use light colors so your CA transfer will show through.
Follow Craft Attitude for adhering the film to the domino. Adhere a strong magnet to the back of the domino.
So, what do you think? Pretty cool, huh? Are you thinking of the multitude of collage images you can use on various shapes and pieces to make your own set of magnets? I'm thinking about Pen nibs, wooden bingo markers, and Bottle Caps, to name just a few. You know three are not enough and I will be making a bunch more, especially since there are so many fab images on just those two collage sheets. Imagine what you can make with any of the fun Altered Pages collage sheets available.
Altered Pages: AP-2550 Create Art collage sheet; AP-2565 I Create, Therefore I Am collage sheet; German Scrap; Double-sided tape; Art Anthology Dimensional Acrylic Paints (June Bud, Baby Blue Eyes, Red Velvet, Kenyan Copper); White Gesso; Glue stick; Ranger blending tool;
MD Hobby & Craft: 12"x12" Magnetic Steel Sheet; 1' x 2' Lincane Perforated Aluminum Sheet
12"x12" Memory Frame (Hobby Lobby)
Acrylic paint: Copper, Verde Gris Glaze
Kraft colored washi tape (or painter's tape)
Sea sponge
Craft Attitude
Dominoes and Matboard
Alcohol inks: Espresso, Latte, Caramel
Alcohol, blender tool, felt
Thanks so much to MD Hobby & Craft for allowing us to "play" with their fabulous products this month. I have another fun idea in the works for my next post in a couple of weeks.

And a big thanks to you for stopping by today. I hope you will check out the rest of the team's projects this month combining these great products from MD Hobby & Craft and Altered Pages.
Have a wonderful and creative week!
Barbara
Don't forget,
You have until Friday to join the
Altered Pages Mother's Day Link Up Party
click HERE for details!
.jpg)
As always great tutorial! Love all the little details in your project!
ReplyDeleteBarbara, This is a very creative memo board. I love the magnets♥
ReplyDeleteBarbara, another stellar creation. Your eye for detail allows for such inspiration! THANKS
ReplyDeleteBeautiful, Barbara!
ReplyDeleteLove it Barb!! And your flower and scrollwork at the top- yum!! Great way to go on those magnets too-very cool!
ReplyDelete