Today I want to share a project using products from both Altered Pages and Stencil 1. There were three two-part butterflies in this stencil set, and as promised, I am going to show you how I used the third butterfly stencil. I have tried to vary the techniques, and my previous posts can be viewed by clicking here for the first post, and here for the second post.
My project today is a layered, collaged card.
 Cut yellow card stock to 5-1/2" x 11", folded in half to make a 5-1/2" square card. Cut two frames, one larger than the other, from blue and yellow houndstooth card stock. Cut a third piece from gray print to measure 2-1/2" by 5-1/2"; punch one edge with Trellis punch. Adhere all three pieces, as shown in photo above.
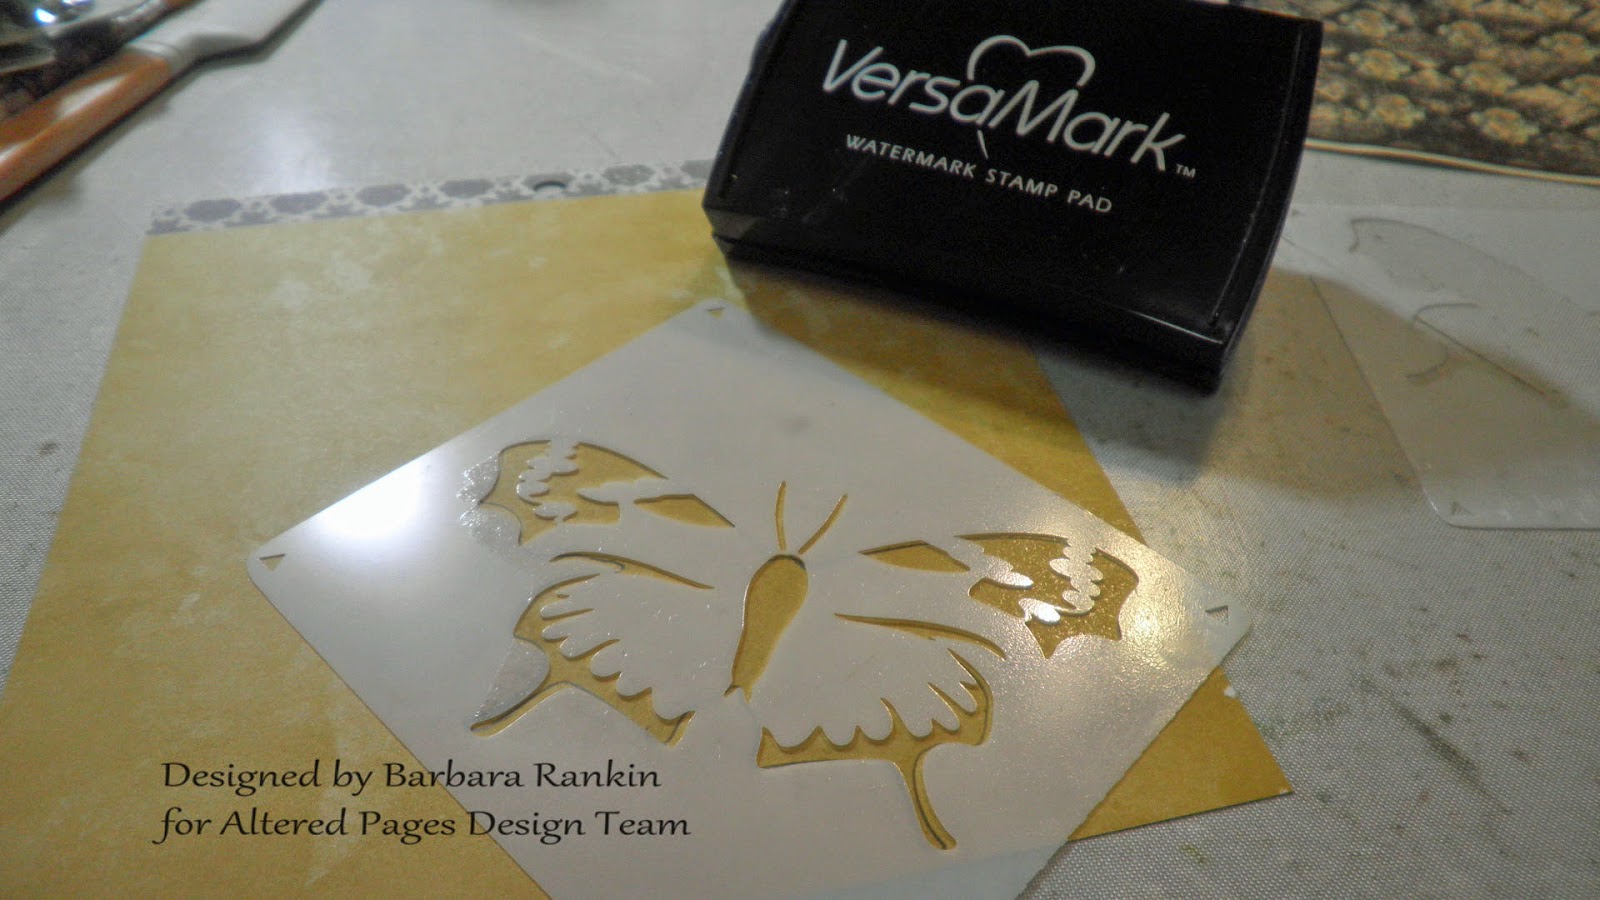
Trace open butterfly onto yellow print paper with a pencil.
 Align matching detail butterfly stencil over penciled image and apply Versamark ink through openings.
 Heat emboss with black puff embossing powder. Trim butterfly, leaving off antennae. Glue wire for antennae to back of butterfly and add Stickles Star Dust to the wings. Edge wings with big brush pen. Gently shape wings for dimension.
 I have had this puff embossing powder for many years and was not sure of my results, so here is a closeup. I like the texture from the puffiness it gives. Kind of interesting, don't you think?
 Fussy cut butterfly, but don't bother cutting out the antennae. They will be replaced with a piece of wire, as shown.
 Adhere the wire to the wrong side of the butterfly, and add Stardust Stickles to the wings. Edge butterfly with a black Big Brush pen.
 Adhere butterfly to card front using 3D Crystal Lacquer. Add Petaloo flowers to bottom left corner. Use Black Bling to make the flourish beneath the butterfly.
Trim the words "summertime" from the Summer Words collage sheet Cut in half and edge with Scattered Straw distress ink. Adhere to card front, as shown.
Edge card base with Scattered Straw distress ink.
Altered Pages: Collage Backgrounds 1 collage sheet; Summer Words collage sheet; Glitz Sunshine in My Soul Patterned Paper Pad; Lifestyle Crafts Nesting Frames 2; Stardust Stickles; Black Bling; Faber-Castell Big Brush Pen; 3D Crystal Lacquer; Petaloo Flowers

I hope you enjoyed my easy peasy card today. I also hope I have inspired you to try some of these products from Altered Pages and Stencil 1. Stenciling is so much fun, and there are so many different ways to utilize them. And be sure to visit the AP Blog regularly to see what the rest of the team is working on.
Have a wonderful and oh so creative week!
Barbara
Trace open butterfly onto yellow print paper with a pencil.
Trim the words "summertime" from the Summer Words collage sheet Cut in half and edge with Scattered Straw distress ink. Adhere to card front, as shown.
Edge card base with Scattered Straw distress ink.
Supplies:
Altered Pages: Collage Backgrounds 1 collage sheet; Summer Words collage sheet; Glitz Sunshine in My Soul Patterned Paper Pad; Lifestyle Crafts Nesting Frames 2; Stardust Stickles; Black Bling; Faber-Castell Big Brush Pen; 3D Crystal Lacquer; Petaloo Flowers
Other Supplies used:
Stencil 1 Butterfly stencil set
Martha Stewart Garden Trellis punch
Stencil 1 Butterfly stencil set
Black Puff embossing powder
Scattered Straw Distress Ink
Scattered Straw Distress Ink
GIVEAWAY
You have one more day to play along. Stencil 1 will provide a FAB stencil and Altered Pages will provide a package of tools! SHARE the Altered Pages blog posts daily on YOUR Facebook page for the monthly random drawing. Include #alteredpages in your post. Drawing on May 1, 2015. More you share more chances to win!
Stay tuned each day and get ready for a giveaway! Stencil 1 will provide a FAB stencil and AlteredPages will provide a package of tools!
SHARE our blog posts daily on YOUR Facebook page for the random drawing. Include #alteredpages
in your post.
Drawing on May 1, 2015.
I hope you enjoyed my easy peasy card today. I also hope I have inspired you to try some of these products from Altered Pages and Stencil 1. Stenciling is so much fun, and there are so many different ways to utilize them. And be sure to visit the AP Blog regularly to see what the rest of the team is working on.
Have a wonderful and oh so creative week!
Barbara
This is so lovely - I love all the time and detail work you took with the butterfly - it really paid off big off time! THIS would make a lovely prize LOL LOL
ReplyDeleteWhen I see your work, I know it's YOU before I read the name! Simply beautiful work with such wonderful details. THANKS for showing us how to do it!
ReplyDeleteLove the detail of the lattice punch. Lovely card.
ReplyDeleteAs always Barbara wonderfully done! Gorgeous!
ReplyDeleteThe Butterfly and card are beautiful♥
ReplyDeleteI love this card! It's so bright and sunny! Great use of your Stencil 1 butterfly.
ReplyDeleteBeautiful Barb! Love that embossing on the butterfly! ")
ReplyDelete