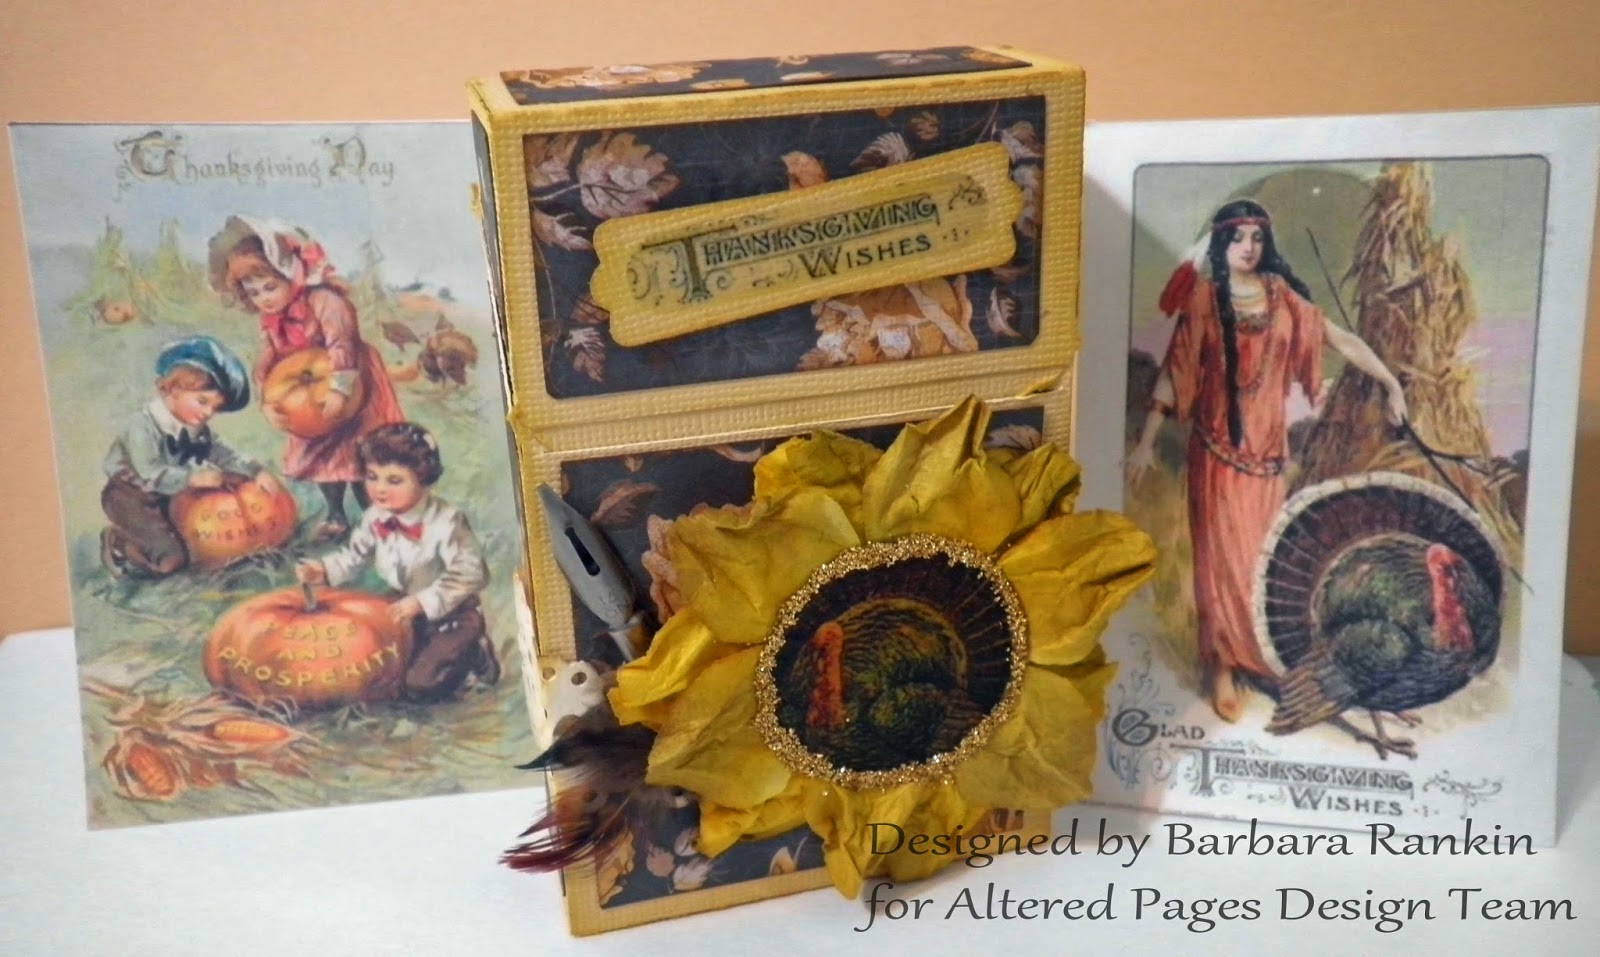
Hello everyone, and welcome back! Well, it's a new month, and a new sponsor. The Altered Pages design team has the great pleasure of playing with Craft Attitude this month, which is an inkjet printable film that enhances any project and can be used on just about any surface.
Since the gift-giving season is upon us, I thought I would make a simple hostess gift. This one is Thanksgiving themed, but could be changed for any occasion.
Supplies:
Altered Pages: AP 2250 Thanksgiving Placecards collage sheet; Thankfully Grateful collage sheet; Kaisercraft Forget-Me-Not paper pad; Glass Glitter (Champagne); Esterbrook & Co. English Oval Point 788 Pen Nib; 3D Crystal Lacquer; Mulberry Paper Flowers
Craft Attitude printable film
Daisy lace border punch
Silhouette machine and cut files (3D Hinged Box)(Ornate Frame)
Feathers
Cut 3D hinged box from tan card stock using Silhouette machine and cut file. Follow directions for assembling box. Cut mats from blue print paper in the Kaisercraft Forget-Me-Not paper pad and adhere to box. These are included in the cut file.
Print six sets of place cards from the AP 2250 Thanksgiving Placecards collage sheet onto white card stock, first resizing them to measure 2-5/8" x 4" when folded to fit inside box.
Print the turkey image (Indian girl with turkey) from AP 2250 Thanksgiving Placecards collage sheet onto Craft Attitude printable film and allow to dry. Then punch out with 1-1/2" circle punch.
 |
| Figure 1 |
Adhere circle punched image to center of one flower, following manufacturer's directions. Pinch and reshape flower petals, as shown.
I blitzed it up a bit by adding a line of 3D Crystal Lacquer around the turkey image and adhering the glass glitter. Print one of the images (Fig. 2) from the AP 2250 Thanksgiving Placecards collage sheet at its actual size onto Craft Attitude film. Allow to dry.
Use Silhouette to cut out an ornate frame, resized to fit the image. Cut one solid background frame and one with the window opening. Add ink colors to match flowers.
Adhere the Craft Attitude printed image to the rectangle removed from the top frame, following manufacturer's directions. Adhere frame piece over that, then adhere the whole piece to the solid background frame.
 |
| Figure 2 |
Adhere large flower to front of box, adding a pen nib and a couple of feathers, as shown. I also punched out the words "Thanksgiving Wishes" from the bottom of the Craft Attitude printed image (see Fig. 1 above) with a label punch and adhered it to a second card stock piece, as shown.
And here is the set of place cards inside the box.
Now, I am sure some of you are asking the very good question, why do I need Craft Attitude film? Why can't I just print my images out on my card stock? Well, here is a perfect example of the difference in image resolution achieved by using the film. On the left, I printed my image directly onto my textured card stock. On the right is the image printed first onto the film, then applied to the same card stock. The difference is amazing. Not only are the colors more intense, but the image allows the card stock texture to come through, like canvas. I tried to capture that in Figure 2 above, but I am not sure it shows up as well in the photo as it does in person.
Another reason for using the film is exhibited in my turkey image that was applied directly to the mulberry flower. It would be impossible to run that flower through your printer, but by printing the image onto the film, you can adhere it directly to the flower and it appears as though the image was printed directly on it.
So, I hope I have answered the big question, and that you are now inspired to try this fabulous product with Altered Pages beautiful collage images. The possibilities are endless with these products.
Thanks for stopping by, and be sure to check back for more inspiration using Craft Attitude and Altered Pages products.
Barbara


Wonderful hostess gift! Great job!
ReplyDeleteWhat a lovely project Barb and such a nice gift! Love the images that you used- they show so well with the the way you printed them- definitely a difference using Craft Attitude film! And one more thing , love what you did to that flower!! ")
ReplyDeleteWow, Barbara, this is fantastic! What a lovely idea for a hostess gift!
ReplyDeleteA very thoughtful hostess gift! Thank you also for detailed instruction♥
ReplyDeleteBarbara, this is so very wonderful. Any hostess would be thrilled to receive it.
ReplyDeleteWhat a lovely gift idea Barbara and I love your comparison of using the film vs printing direct to the cardstock too!
ReplyDeleteLovely gift idea1 Thanks, Barbara for giving us a comparison of media ... will have to try the film!
ReplyDeleteThis film is amazing. I hope I can try it one day. Thank you for sharing this project.
ReplyDeleteBeautiful!
ReplyDeleteMarilyn
Great project, Barbara! Love the flower print idea!
ReplyDelete