The Altered Pages Design Team is really excited to be working with PanPastels during September. We hope you enjoy seeing what we create and are inspired to work with them yourselves. PanPastels will be available AlteredPages.com soon!
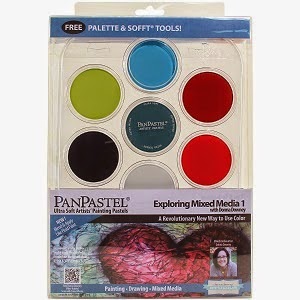
"Ultra Soft Artists’ Painting Pastels. For Painting, Drawing & Mixed Media! A revolutionary new way to use color! PanPastel Colors are professional artists’ quality soft pastel colors packed in a unique pan format (cake-like). The special qualities of PanPastel Colors mean that artists can blend and apply dry color like fluid paint for the first time."


To start I used my VersaMark Dazzle pad with a sponge and carefully applied the VersaMark on my paper through the stencil.


 The panel was layered on Black Cardstock and then on the card. A green ribbon is the finishing touch.
Visit the blog during September and see what the Altered Pages Design Team has in store for inspiration!!! Be sure to comment each day on the blog for a chance to win a set of PanPastels. A random drawing will take place at the end of the month, for each comment your name gets entered again! More comments, more chances of winning! (one comment per day please).
"Ultra Soft Artists’ Painting Pastels. For Painting, Drawing & Mixed Media! A revolutionary new way to use color! PanPastel Colors are professional artists’ quality soft pastel colors packed in a unique pan format (cake-like). The special qualities of PanPastel Colors mean that artists can blend and apply dry color like fluid paint for the first time."
Today I would like to share using PanPastels with stencils to create awesome backgrounds.
To start I used my VersaMark Dazzle pad with a sponge and carefully applied the VersaMark on my paper through the stencil.
Then with one of a PanPastel soft sponge I gently applied the PanPastel in a circular motion.
Here you can see three different stencil patterns.
I created a card using one of the pattern papers I created. The "H" is from the "H" is for Halloween collage sheet, printed on Craft Attitude™ printable film.
 The Halloween image is from the Halloween ATCs collage sheet (layered on black cardstock).
Visit the blog during September and see what the Altered Pages Design Team has in store for inspiration!!! Be sure to comment each day on the blog for a chance to win a set of PanPastels. A random drawing will take place at the end of the month, for each comment your name gets entered again! More comments, more chances of winning! (one comment per day please).
Such a lovely card Lyneen, I love the colors and chosen image. Can't wait to see what the team get up to this month using their Pan Pastels.
ReplyDeletePanPastels have such intense color!!! Thanks Danie May!
DeleteThe pan pastels have such a beautiful vivid color... Gorgeous card Lyneen
ReplyDeleteThanks Toni!
DeleteJust getting into paper crafting. Pan pastels made such a gorgeous card. I'm so in to learning more.
ReplyDeletePat in NY... be sure to watch our blog everyday. We post something new everyday!
DeleteLove the pops of color! Fabulous card!
ReplyDeleteBeautiful
ReplyDeleteThanks Debi!
DeletePat in NY, we will have many videos for you to see! Love this card Lyneen, nicely done!
ReplyDeleteThanks Jean!
DeleteYour card is really striking! I love the background!! Good info here. Thanks, Lyneen!
ReplyDeleteThanks Robin... it was a lot of fun to make!
DeleteGreat card, Lyneen! Love the color choices and images are terrific!
ReplyDeleteThanks Barbara!!! The PanPastels are great to work with... the color is vibrant!
ReplyDeleteBeautiful Lyneen...It really puts me in the Autumn/Halloween mood. How did you get the "H" on your card? Did you print it on the paper you created with the Pan Pastels or ????.
ReplyDeleteRoni the H was printed on Craft Attitude printable film!
DeleteThe PanPastels look like interesting ! Win or loss I willl be using them!
ReplyDeleteJackie they are a lot of fun to play with!!!
ReplyDeleteGreat card! I love the colors. Will have to get some PanPastels to try... looks like fun!
ReplyDeleteWonderful fall card!
ReplyDelete:)
LOvely card - thank you for the tutorial.
ReplyDeleteOne question - did you life the stencil before or after you put the pan pastels on Versa Mark?