
Hi friends! As you may already know for the month of July Altered Pages is teaming up with The Leaky Shed Studio. We are very excited for this collaboration. It is sure to be the result of many fun and inspiring projects.

The theme of this month is "flies" and no we don't mean those nasty little fellows that bug us during summer picnics. We mean anything, and we do mean anything, that flies.
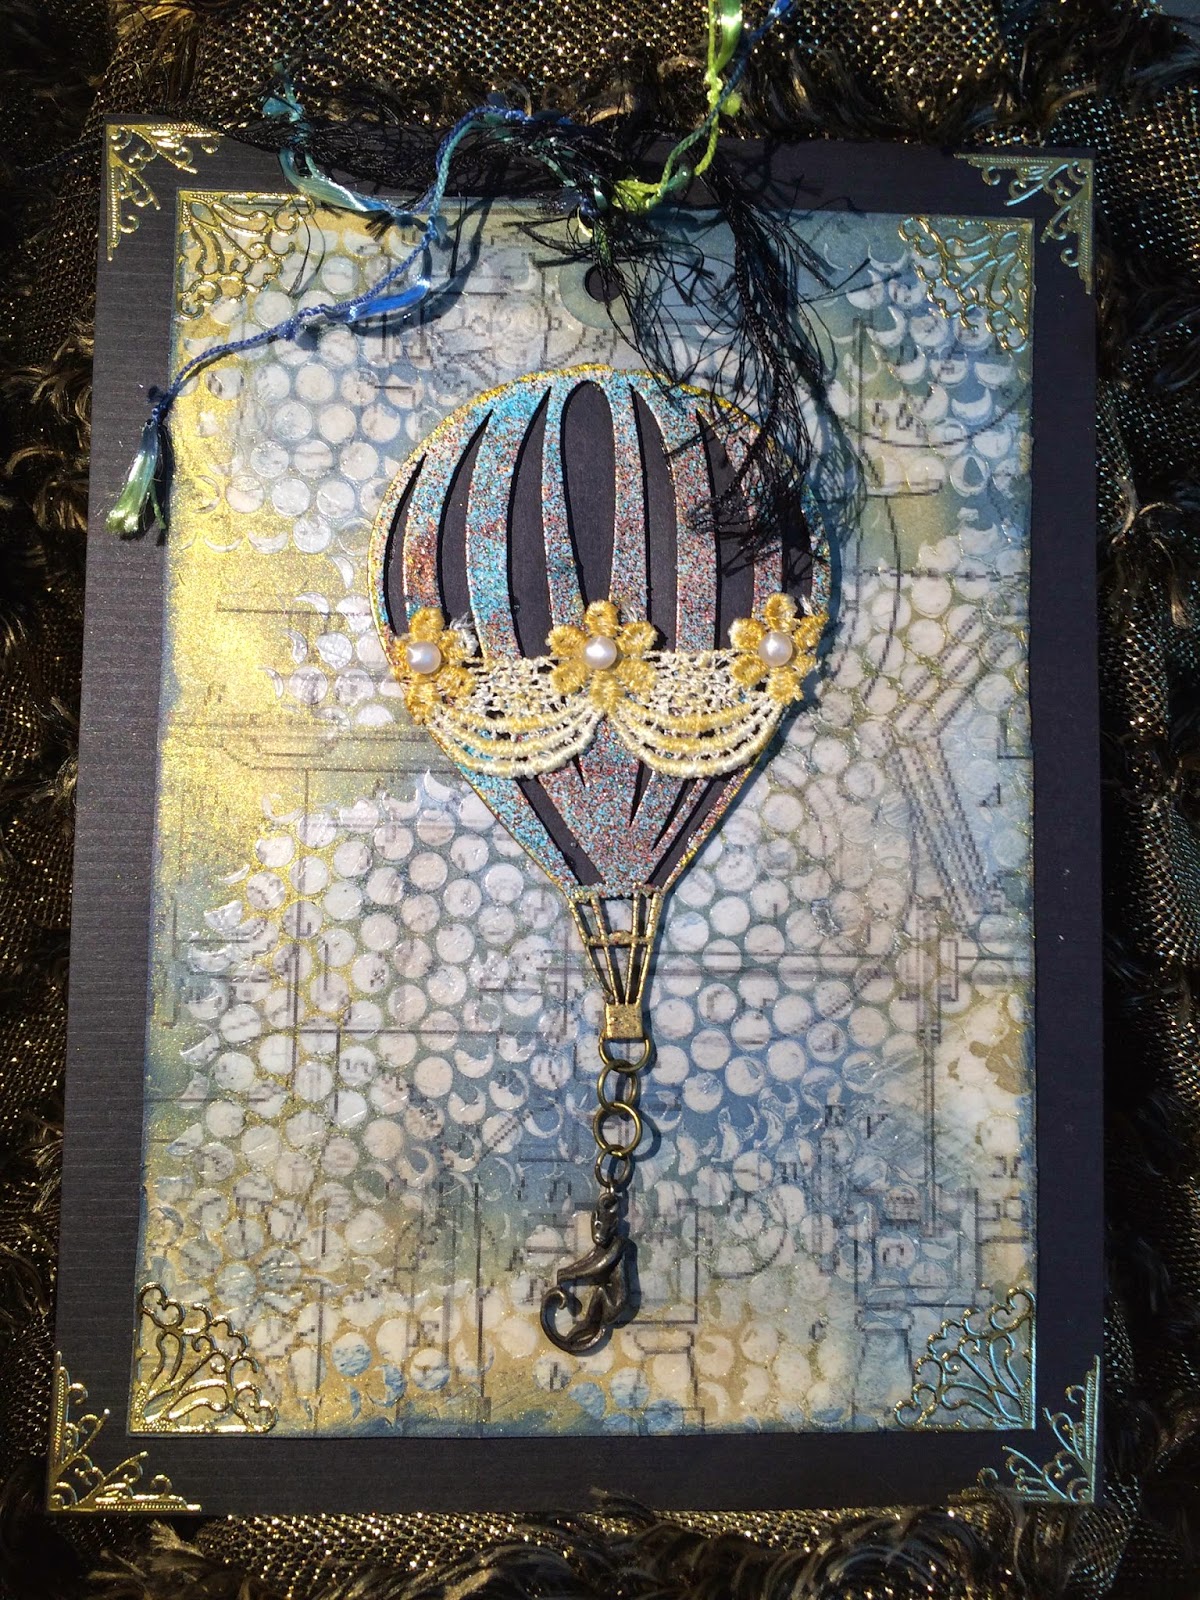
For my project I chose to use Leaky Sheds "Hot Air Balloon 2". I companied this with some great Altered Pages products and well, my project took FLIGHT!
I am going to TRY and let the photo's do the talking in this post with just a minimal amount of detail for the instruction. I was a little camera happy while creating this, so there should ample photo examples. I am not kidding when I say camera happy...you will see. :-)

I began colorizing my Hot Air Balloon using my Nautical Blue Memento Luxe ink pad and a sponge dauber.

While the ink dried on the hot air balloon, I went to the collage sheet that I was going to basically create a giant tag with. I used the Steampunk and Gears collage sheet and just enlarged the portion I wanted, cut that out and punched a whole in the top to create a tag.

Next, I colorized the image by taking my Toffee Crunch ink pad directly to the paper.


I then added a bit of texture by using a scrap piece of punchinella and my Clear Creative Medium.


While the Creative Medium was drying I went back to my balloon and embossed it a few times over, layering it with multiple different embossing powders. I used a glittery gold, then a timber brown and finally a vibrant turquoise on the body of the balloon. For the cable and basket portion I used only metallic gold. A little advice be careful not to overheat your chipboard piece as with most embossing projects.


I then went back to my tag and added layers of color alternating with Toffee Crunch, Nautical Blue and Delicata Golden Glitz. You can really see here the texture and depth that the medium gives you. I love that you can still see the gear image under it all.

I then took the large tag and mounted it on a larger still piece of navy blue card stock. I wanted it to really pop and I think the dark background does the trick. I added gold gilded stickers to the four corners for a little extra shiny goodness.

Going back to the balloon now...I added a scrap of the navy blue paper behind the balloon portion and added a charm that is a fun flying monkey. Maybe he's evil, we don't really know him well enough yet to know these kind of things. Either way he just fit, plus I always love adding something dimensional and mobile to most of my mixed media pieces.

I also added a scrap of lace that I colorized with the Delicata Golden Glitz, a few pearl Dew Drops and pretty fibers tied to complete the tag. I actually think this would be lovely made into a card or added to the front a gift bag.


Supplies used;
Mementos Inks - Nautical Blue and Toffee Crunch
Delicata Ink - Golden Glitz
Dew Drops - pearl
Clear Creative Medium
I like the multiple layers of EP on your balloon. This tag is really cool.
ReplyDeleteLove it! Reminds me of The Wizard of Oz with the fun little monkey hanging from the balloon!
ReplyDeleteThe colors and depth really make the balloon pop!
TFS!
Wow, that is SO cool!!! I really love it! Beautiful work and tfs!!
ReplyDeleteI love it! The lace trim was perfect for the balloon, nice to have all those goodies for when you need them! The texture is great!
ReplyDeleteFabulous tag. Love all the textures and elements. I think your little monkey is just full of mischief, not really evil. Perfect fit!
ReplyDeleteI really like the depth of the textures you were able to get - as I love hot air balloons it was a given I'd enjoy your work! You put so many details yet when the all come together - it doesn't feel as though it's all separate but melded perfectly together-just lovely! ♡ - happy you shared ! Thank you
ReplyDeleteLove the way you have created rich color and texture on your Balloon Stephanie, great project!
ReplyDeletewow, beautiful.
ReplyDeleteLove all the details!!! Awesome job!!!
ReplyDelete