Hey there, Barbara here with an extra project to share with you this month. For this post, I wanted to share some tips and techniques using a new product at Altered Pages called Art Anthology Sorbet dimensional acrylics. I started out with a blank manila tag, but I could not stop at just showing you the techniques on the tag. I had to finish it, and here is the result.

Supplies:
AP 467 Mystic Asian collage sheet
Vintage Text Pages
Art Anthology Sorbet Dimensional Paint: Kenyan Copper, Blue Eyes, Mint Julep, Kona,
Red Velvet, Orchid


 Punch an equal number of vintage text butterflies and flowers to adhere beneath each of your paint pieces. Here, you can see the text beneath the butterflies.
 Here, I have offset the text pieces with the painted pieces. To finish off the flowers, I also added chocolate dew drops from The Robin's Nest.
 Thanks for hanging in there with me on this new paint adventure of mine. I discovered a lot fun things to do with Art Anthology Sorbet Acrylics. I hope I have inspired you to give this awesome paint a try in your own creations.
Be sure to visit Altered Pages for all of your art supplies, and The Robin's Nest (our cross promoter this month) for their papers and, of course, those wonderful dew drops. Many thanks to them for providing us with such fun products to work, I mean play, with.
Have a wonderful, creative weekend!
Barbara
Black Hole Art Studio
Supplies:
AP 467 Mystic Asian collage sheet
Vintage Text Pages
Art Anthology Sorbet Dimensional Paint: Kenyan Copper, Blue Eyes, Mint Julep, Kona,
Red Velvet, Orchid
Blue/green cardstock (8" x 9-/4")
Distress ink: Vintage Photo
Punches: Hydrangeas, Mini Butterflies, Sakura (Martha Stewart)
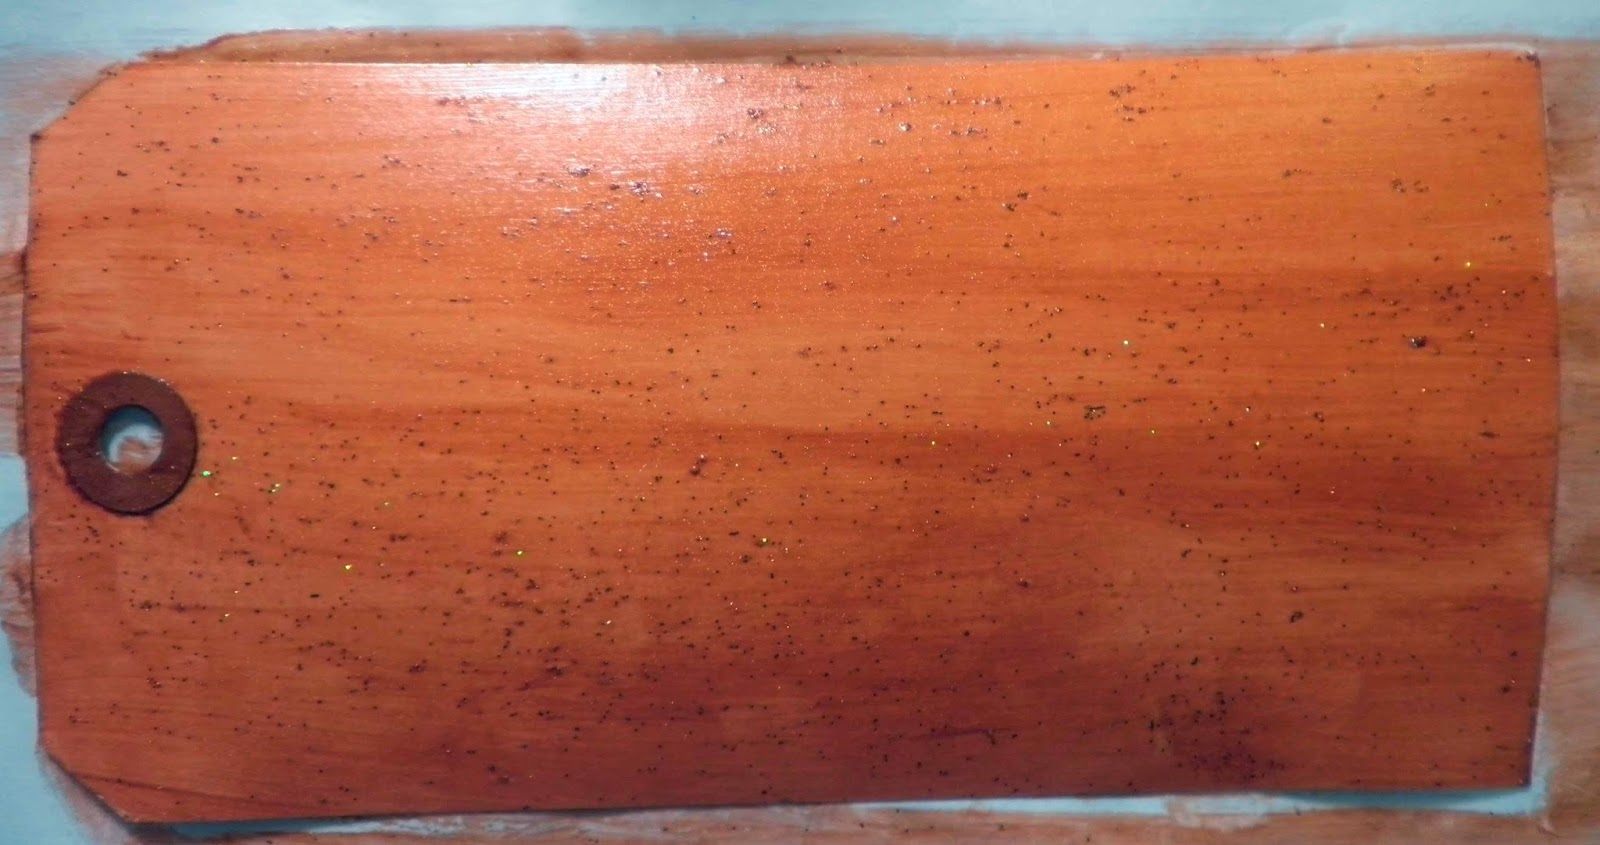
Brush a coat of Kenyan Copper over tag and let dry. The little flecks you see in the photo are glitter. (TIP: I found that dampening my brush with a bit of water allowed me to brush on a smoother coat.)
Fussy cut geisha angel and adhere to tag. (TIP: A good PVA glue works really well for adhering your collage images without wrinkling your paper. I like to use a paint brush to get complete coverage. Then I use a bone folder to rub it down really well, and wipe up any excess glue that oozes out from beneath the image.)
Tape both your tag and stencil down with a piece of removable tape.
 With a palette knife, apply a coat of Blue Eyes through the corner design on the stencil. Clean your stencil and palette knife with water right away. I was amazed at how quickly this acrylic dried. This is good for those of us who like to move on with our project. Nothing is more boring than "waiting for paint to dry".
I just had to share a pic of the paint in the jar. It is very creamy and thick, which allows it to maintain some dimension when applied through a stencil, or just smeared on thickly.
(TIP: You can use a paint shaper or Brushstix to clean up any paint seepage. It works great.)
Apply Mint Julep through diamonds part of stencil with a palette knife and let paint dry.
Now, this is a bit bright for my taste, so I wanted to see if I could tone it down by brushing Kona all over the tag. For this photo, I only brushed it onto the left side, the bottom, and most of my collage image. I wanted to leave some untouched so you could see the difference. The photo does not show it really well, but the orange color is brighter on the upper right, and the geisha's wings on the right are much "whiter".
 Because this paint is translucent, the image still shows through, as does the previous color underneath. It reminds me of Tim Holtz' distress inks, only in acrylic form, and unlike distress inks, can be applied dimensionally. I love this product and all the colors. This photo shows the tag completely covered with the Kona.
 I wanted to try another technique that I've done before with regular acrylic paints. So, I applied a thicker coat of Orchid and Red Velvet to a piece of release paper with a palette knife and let it dry. This took much longer than the previous layer applied through the stencil. I ended up carefully using a heat gun to speed up the drying time. Be careful not to bubble the paint.


Next, I peeled the paint up from the release paper.
Then I used a couple of small punches to punch out some butterflies and flowers.
In the photos, you can see the translucence of this paint, as the printing on the paper shows through. It shows through the Orchid a bit more because it is a lighter color.
I was not thrilled with my color choices at first, but as I worked on it, I began to see myself in my work again. I also realized that the Orchid flowers were not going to work with this project, so I opted to save them for another project and went for the deep, rich color of the Red Velvet. Before proceeding, though, I needed to set the scene for them.
So, trim blue/green cardstock to 8" x 9-1/4", score and fold in half to make a tall card that fits into a #10 size envelope. Trim vintage text to 3-3/4" x 8" and adhere to card front. (Don't forget to distress the edges with Vintage Photo distress ink, including the tag.)
Adhere tag to card front.
Spritz 18" piece of seam binding ribbon with water. Paint ribbon with a wash of Red Velvet, let dry.
Tie into a double bow and adhere to top of tag. The paint actually stiffens the ribbon a bit and gives it some body, which helps it hold its shape.
Be sure to visit Altered Pages for all of your art supplies, and The Robin's Nest (our cross promoter this month) for their papers and, of course, those wonderful dew drops. Many thanks to them for providing us with such fun products to work, I mean play, with.
Have a wonderful, creative weekend!
Barbara
Black Hole Art Studio
Such a great introduction for me to the Art Anthology Products Barbara, I love the wonderful dimension of the Sorbet paints you used on your tag. Is release paper like a baking paper/greaseproof paper???
ReplyDeleteThese sheets are actually the release paper from my Xyron, but freezer paper would work, too.
DeleteReally pretty! Those paints are kind-of translucent! I love that!
ReplyDeleteBarbara, YOU create the most beautiful art! Great technique!
ReplyDeleteBeautiful Tag! I love the red you added!
ReplyDeleteSTUNNING! SOo much detail, love your colors, awesome techniques!!
ReplyDeleteSo pretty! And what a great tutorial. Thank you so much. I'm going to have to try this product. Anne,yourmainetmper
ReplyDeleteA beautiful piece of art. Thanks for the introduction to a new product!! I absolutely love your flowers.
ReplyDeleteLovely Barbara! I love your nifty technique for the flowers and butterflies! I haven't had a chance to play with that paint yet but it's on my list of must have's thanks to you :) (and that's a good thing - lol!!).
ReplyDeleteTFS!