
Fall Banner

Hi everyone !! Eunice here , with a quick little banner to make for fall !  I wanted a larger size banner to either hang alone or also hang on a wreath , so either way it works !!
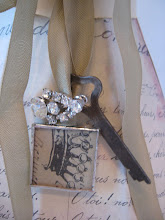
I cut my banner from heavy chip board , you can also use card board or whatever you have handy !! First covered banner with vintage sheet music paper for the background, inked the edges ! Using a hole punch I punched two holes on the top to hang it ! The fun part of embellishing comes next ! I created some folded flowers , you can create these with the Scor-Pal available at Altered Pages !I layered two and topped with a colorful brad !
 Using rubber stamps I made my "FALL" statement ! I used my License Plate stamps , a super fun stamp set for writing words for projects or journals ! I stamped on cardstock , crunched it up and then inked it for a worn look ! I added a little twig at the top with my ribbon to hang , another fall touch !
 I used a little colorful brad & paper embellishment for the bottom !  The background of the banner was some embellishment laying on my crafting table , you can add any paper strips , words, or ribbon for a layered look !
This is the banner in full view !! I also attached two little leaves tied with a cord , I also gave them a good crunching also !!! Happy Fall days ahead and have a great and creative day !
Eunice

Comments

  1. Way cool!!! You always seem to find good ways to use stamps and add those nice little details that's makes it look like your own style. Like your photo styling too.

    ReplyDelete
  2. Very nice banner. Love the fall colors and your embellishments are way cool.

    ReplyDelete
  3. Eunice, you always knock my socks off...absolutely gorgeous!

    ReplyDelete

Post a Comment

Popular posts from this blog

Get on Over!

We like having you visit,  Make sure to subscribe... Just click here - easy peasy November will be filled with Die Cut ART,  join us. Embellish premade pieces art by Barbara Rankin Cut your own pieces Paint or Foil to add interest art by Lyneen Jesse Combine Die cuts in a variety of mediums art by Jean Moore Create with your manual die cutting machine  or buy premade
 Handy Tip for Artists, Recyclers and Neat Freaks! I have a follow-up to the Citra-Sol method for creating fabulous background pages and collages.   I bought a big bag of navel oranges and realized I had the ingredients to make my own solvent!   Simply take a clean glass jar, peel the rind from the oranges and place all the rind/peels, without the pulp (tangerines, oranges, navels) into the jar.   Pour enough vinegar over the peels to cover them.    Allow the jar to sit for a week or two and VOILA!     You have made your own solvent for literally pennies.    You will notice the liquid getting a bit thicker than the plain vinegar and it does not smell bad!!! I now have a  HUGE jar on the window sill!       Be careful and only use this after testing on a safe spot.

DINA WAKLEY Featured Artist

We are SO Proud to present Dina Wakley with her ART and February Tip   (oops, she says she is totally disorganized, so there is HOPE for all of us!) Dina Wakley is a mixed-media artist and teacher. She loves everything about art: creating it, thinking about it, looking at it, and teaching it. Dina is passionate about teaching art. She teaches both in-person and online workshops.  She is a docent at the Phoenix Art Museum, where she gives tours to school groups and gets kids excited about art. As a Ranger Signature Designer, Dina designs a line of mixed-media art supplies that includes acrylic paints, mediums, brushes, rubber stamps, stencils, and more. Look for the Dina Wakley Media Line by Ranger at a store near you.  Dina's books Art Journal Freedom and Art Journal Courage are available now. Also look for three new North Light DVDs starring Dina, available this month: "Art Journal Mark Making and Throwing Ink," Art Journal Color Courage," and &q