Hello everyone! I hope you are all safe and sound. To all my Texas friends, I hope you are holding out alright in the midst of the storm!
Today I am bringing you a Mixed-Media collage canvas using a mix of my awesome PRIMA flower stash. Can I just say how much I LOVE PRIMA? Their flowers are done in such yummy colors and textures, I can't help but be inspired!
I hope you enjoy.
SUPPLIES:
Canvas board substrate (this one is 8 x 10)
Miscellaneous embellishments ( metal, plastic, etc. from my stash)
Acrylic Paints - Assorted colors
Modeling Paste
Assorted mulberry papers
Collage image (from my stash)
Colored pencils or paint (to color her face)
Grabbing my stash of supplies - Here you can see that I have torn up some of the vintage pages and adhered them to the canvas board. No particular pattern, I used foreign text and varied colored pages.
TIME SAVING TIP: I often do multiples of these pre-collaged canvas boards at least to this stage. They are perfect to grab and go! Collage or paint on top, quick and easy start. Also helps me sometimes with the whole "staring at a blank canvas" thing. This way, There is always a starting point. Sometimes the whole thing gets covered over, but that's ok too!
I start my painting process. I have chosen 3 paint colors that I like together. I drop some color directly from the bottle and use a plastic credit card or similar to pull the color across the canvas. You can absolutely use a paint brush or your fingers, I just prefer this method.
Second and third colors added. I wait for each color to dry pretty well otherwise you can get a bit of a muddy tone going if they over mix.
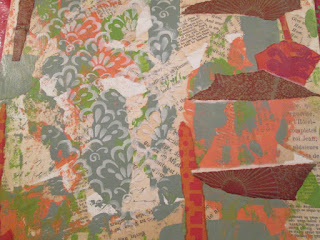
Here I start tearing pieces of my patterned mulberry papers and placing them on at random. I like to stick with a theory of 3 or more.. Where you place a color on the page at least 3 times so that it doesn't look like a mistake. You can see on the right side the maroon/gold paper is in 3 strips close together, but I have added another piece to the left top side just to pop that color since I knew I would be covering up most of the paper with the image. I also used the orange-red patterned paper 4 times in varied spots to tie it into the paint scheme. I used a stencil and randomly applied molding paste through it. This creates a random pattern of raised texture on the board (the whitish fan type design you can see on top). Molding paste dries to a white. You can get it in colors or you can mix a color into it before applying but I will typically use the white until I figure out exactly what I want to do to it.
Here I went back in and added some gesso on top of the papers to push them into the background so the colors become muted.
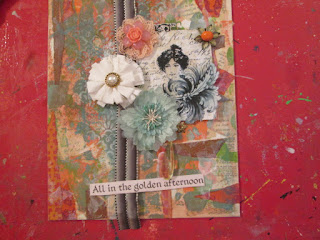
Now I play with my embellishments and image. I find a placement and colors that I like and glue them down. The 3 flowers to the left of the image are all PRIMA! I have added an extra plastic flower embellishment on top of the peach lace flower because I LOVE dimension and the middle piece, while pretty, was kind of flat and looked strange next to it's neigbors. I add some words, trim the ribbon and now to add the finishing touches
Here is the finished canvas! I have used some metallic gold on top of the raised area where I used the molding paste through the stencil. I use a little gold on the edge of the canvas then use a black acrylic paint to loosely paint on a "frame". I also used some watercolor pencil to color in her face and add some color to the flourish in the image and also to the text line.
I hope you have enjoyed this project. If you have any questions for me, please use the comment section below and I am happy to answer!


Comments
Post a Comment