Hello everyone. The Altered Pages design team is sharing some fun projects using stamps from this month's sponsor, Rubber Stamp Depot. Their stamps are beautiful and deeply etched red rubber. There is even a coordinating set to match the beautiful Sabor Papel paper, which I am also using today.
I decided to make a card and matching tag with these beautiful papers and two of the stamps from the coordinating set .
I used the three Gelato colors shown below with a water brush to color the stamped eco board images. I was trying to match the Recuerdos Amor paper color. The Gelatos make easy work of this and blend beautiful with the Water Brush.
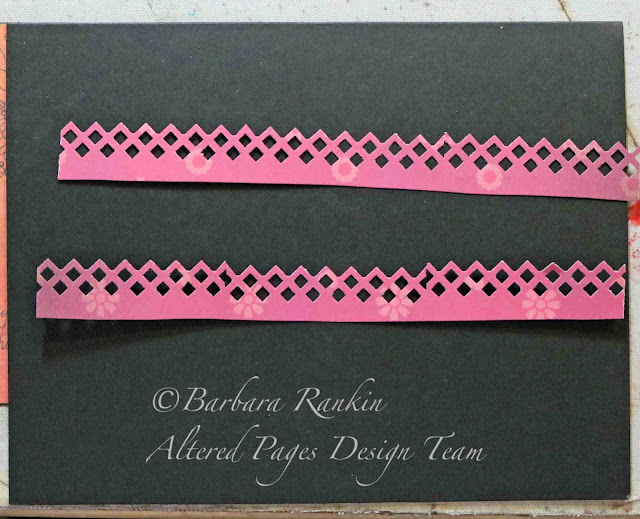
I used a decorative edge punch to make these pink borders from the Picado paper.
I adhered each border piece to the Recuerdos Amor paper using Double Sided Tape ⅜ inch, then adhered the papers to the black card.
SUPPLIES USED:
Sabor Papel: Recuerdos Amor, La Guitara, Ramitos, Sopressa, Picado, Corazonitos, Sentimentios Amor
Red Rubber Stamps: Pierced Heart rubber stamp; Divided Heart rubber stamp
Eco board
Gelatos
Big Brush Pens
Water Brushes
Sari Silk Ribbon
Double Sided Tape ⅜ inch
Black Stazon Midi ink pad
3D Crystal Lacquer
Black card stock
Decorative edge punch

I decided to make a card and matching tag with these beautiful papers and two of the stamps from the coordinating set .
Let's start with the card. I stamped the two heart stamps onto separate pieces of eco board with Black Stazon Midi ink.
I used the three Gelato colors shown below with a water brush to color the stamped eco board images. I was trying to match the Recuerdos Amor paper color. The Gelatos make easy work of this and blend beautiful with the Water Brush.
I filled in the background of each eco board piece with the pink Gelato, again blending the color with the water brush. When that was dry, I edged each eco board with the black Big Brush Pen.
I used a decorative edge punch to make these pink borders from the Picado paper.
I adhered each border piece to the Recuerdos Amor paper using Double Sided Tape ⅜ inch, then adhered the papers to the black card.
I used a scrap left from the Picado paper to die cut a small doily piece, then glued the eco board on top. To finish if off, I add 3D Crystal Lacquer over the stamped image.
For the tag, I used a piece of the Corazonitos paper cut to 3" x 4-1/4". I rounded the bottom corners and punched a hole in the top center.
I cut a small label from the Sentimentios Amor paper and adhered to the lower bottom left of the tag. I cut a partial image of the guitar from the La Guitara paper and edged with the Black Big Brush pen.
I used the reverse side of the La Guitara paper and adhered above the small label. Then I colored it with the orange Gelato, blending the color with the water brush. I punched another piece of the Picado paper and adhered to the bottom of the tag. The stamped eco board was glued down over the label and a piece of Sari Silk Ribbon was added through the hole.
Sabor Papel: Recuerdos Amor, La Guitara, Ramitos, Sopressa, Picado, Corazonitos, Sentimentios Amor
Red Rubber Stamps: Pierced Heart rubber stamp; Divided Heart rubber stamp
Eco board
Gelatos
Big Brush Pens
Water Brushes
Sari Silk Ribbon
Double Sided Tape ⅜ inch
Black Stazon Midi ink pad
3D Crystal Lacquer
Black card stock
Decorative edge punch

I hope you have enjoyed my project today, and be sure to check out all the fun things at Altered Pages.
Thanks for stopping by, and have a wonderful, creative week!
Barbara


I like the card and matching tag. It's a great "thinking of you" gift for someone far away without breaking the bank on postage. Great colors!
ReplyDeleteThanks, Robin.
Deletewonderful combination of products on this charming project! xo
ReplyDelete