Liven up your Cinco de Mayo table with a festive centerpiece and pyramid boxes to contain yummy Mexican Wedding cookies.
You can whip up this tablescape in a snap.
You can whip up this tablescape in a snap.
The list of supplies is as follows:
Tissue Paper
Pipe Cleaners
Plastic Straws
Pringles Can
I cut the empty Pringles can in half and glued a circle of paper to the bottom of the open can.
Strips of double sided tape were added around the can at the top and the bottom.
Using the postcard sized paper it covered most of the can and was the perfect height. I filled in the gaps with pieces of background paper.
The mini ball trim was great where the papers met.
The finished cans:
Too cute, huh?
On to the pyramid boxes. This is a simplified version that does not require a diecut machine.
Cut a 6 x 6 section of paper and score at 2" intervals. Turn and score at 2" intervals the other direction.
This is how it should look:
Cut off the corner squares.
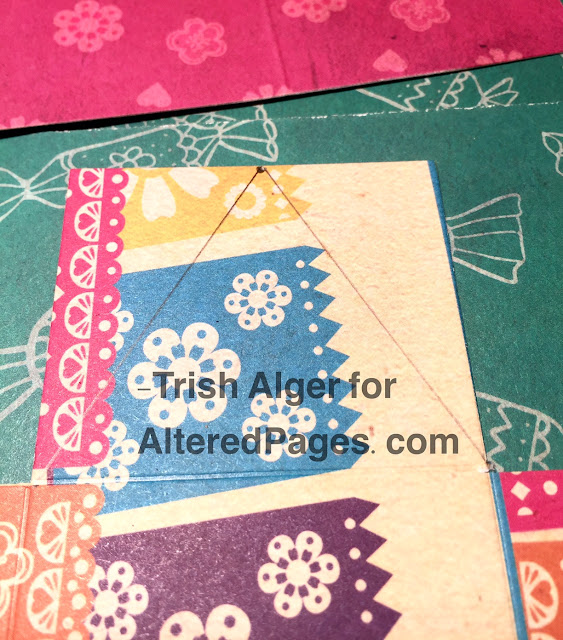
Find the center point of each outside square and draw a line to the connecting edge on each side.
Cut the outside edges. This will be a triangular point when done.
It looks like a throwing star.
Punch a small hole towards the top of each point, fold up the sides, and thread the sari ribbon through each to enclose over the cookie. A small piece of tissue paper can be placed under the treat if you wish.
Now to finish the centerpiece. I placed a piece of tissue paper in each can and filled halfway with dried beans. I added plastic straws with a small slit in the end to hold my Latin cards.
More in love with it than ever! I found a simple tutorial for tissue flowers; and folded and cut my way to colorful fluffiness.
Here is the Sabor Table Decor in all it's glory, complete with treat:
I hope that you have had as much fun as we have with Sabor this month. The Design Team has been working hard to inspire all with the Sabor festivities. Please let us know you stopped by.
Ciao for now,
-Trish Alger
justchickenscratch.com


I may have to do this for my table! Love it!
ReplyDeleteThank you Jean, so easy peasy!
ReplyDeleteFabulous ideas! xo
ReplyDelete