
Here in Central Texas, as the Blue Bonnets bloom and warm breezes blow in the soft sounds of Spring, I await the loopy flight of dragonflies.

Until then I will create my own, with this lovely set:
Muse Dragonfly Rubber Stamp Set. I am going to use similar techniques I employ for my Art Journaling each day. My goal is to play each day. So just play and allow your instinctive creativity to set the pace and show you where to place your mark.
Art Journaling is a wonderful practice with lots of media preferences. Use your imagination... no limits on what to use or how to use it!
My ingredient list:
Muse Dragonfly Rubber Stamp Set
Acrylic Block for Rubber Stamps
Splash Ink
Water Brushes
Paint Pots with Lids
Stazon Ink
Art Anthology Sorbet Dimensional Acrylic Paint
Gelatos
Medium Textural Accents
Stencil
Wink of Stella Pens
Assorted Pens
Oil Pastels
Stickles
Unusual Paper for Layering
Cardstock for Layering
Spatulas
Pipettes
Scissors
Watercolor Paper
I have become a huge fan of the Splash Inks. Using just the four bottles you can create over 100 color recipes. With the Pipettes and the Paint Pots with Lids you can create a few hues to suit your project.

I took the pipette or the Water Brushes to create drips or washes or splatters on my watercolor paper.

I had fun with it. Let some areas dry and dripped back over it or dropped water to disperse the color. Loose and free was the technique.
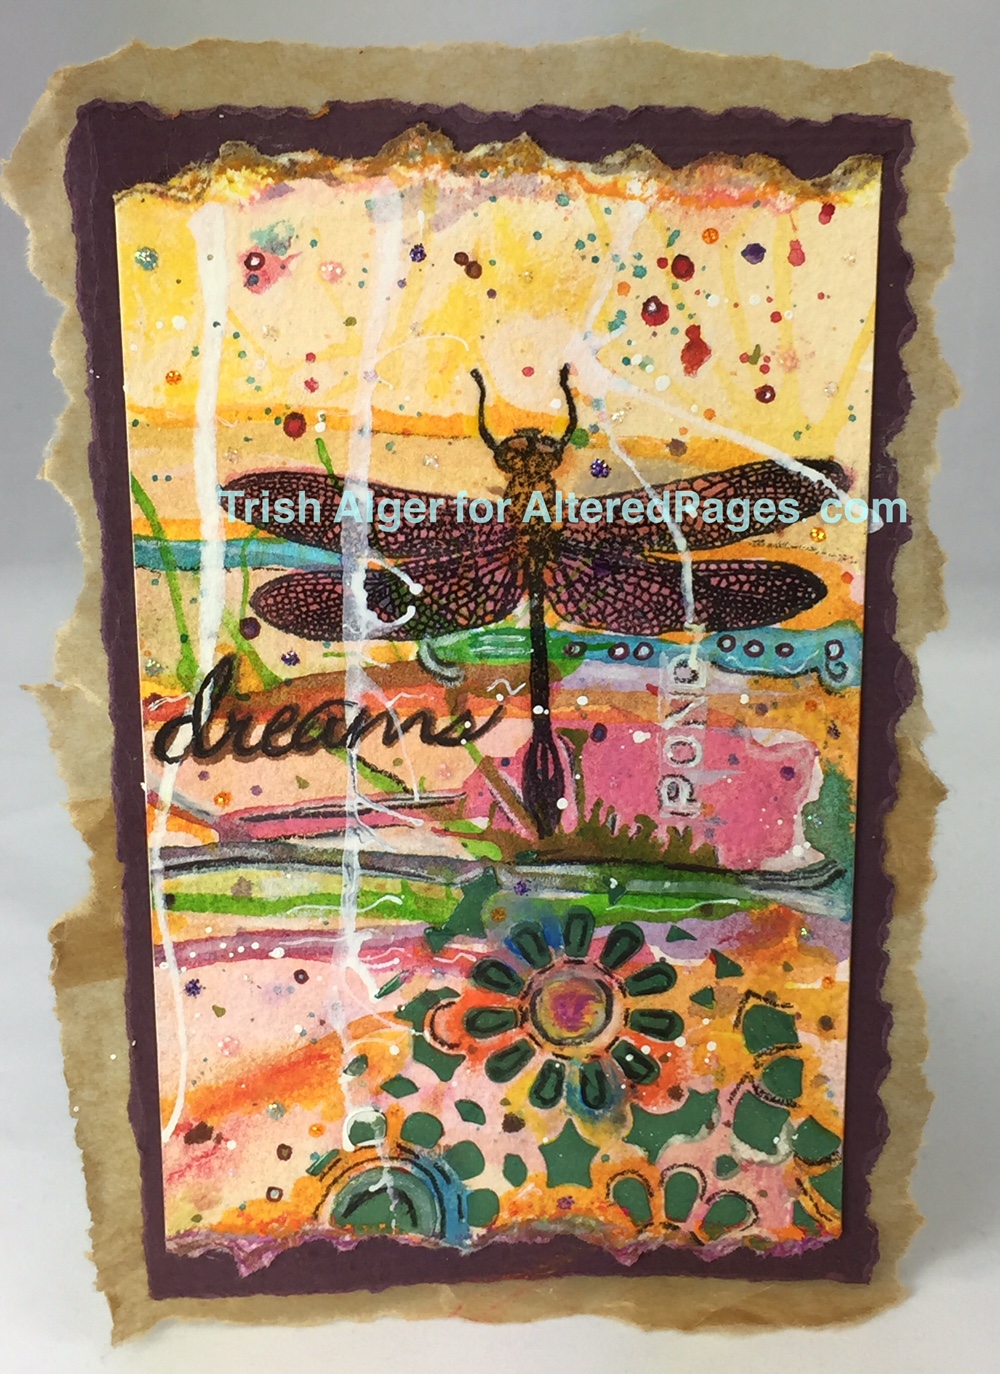
Then the dragonfly stamp was inked with Stazon Ink and pressed to the watercolored paper. I used extra ink to watercolor in the wings.
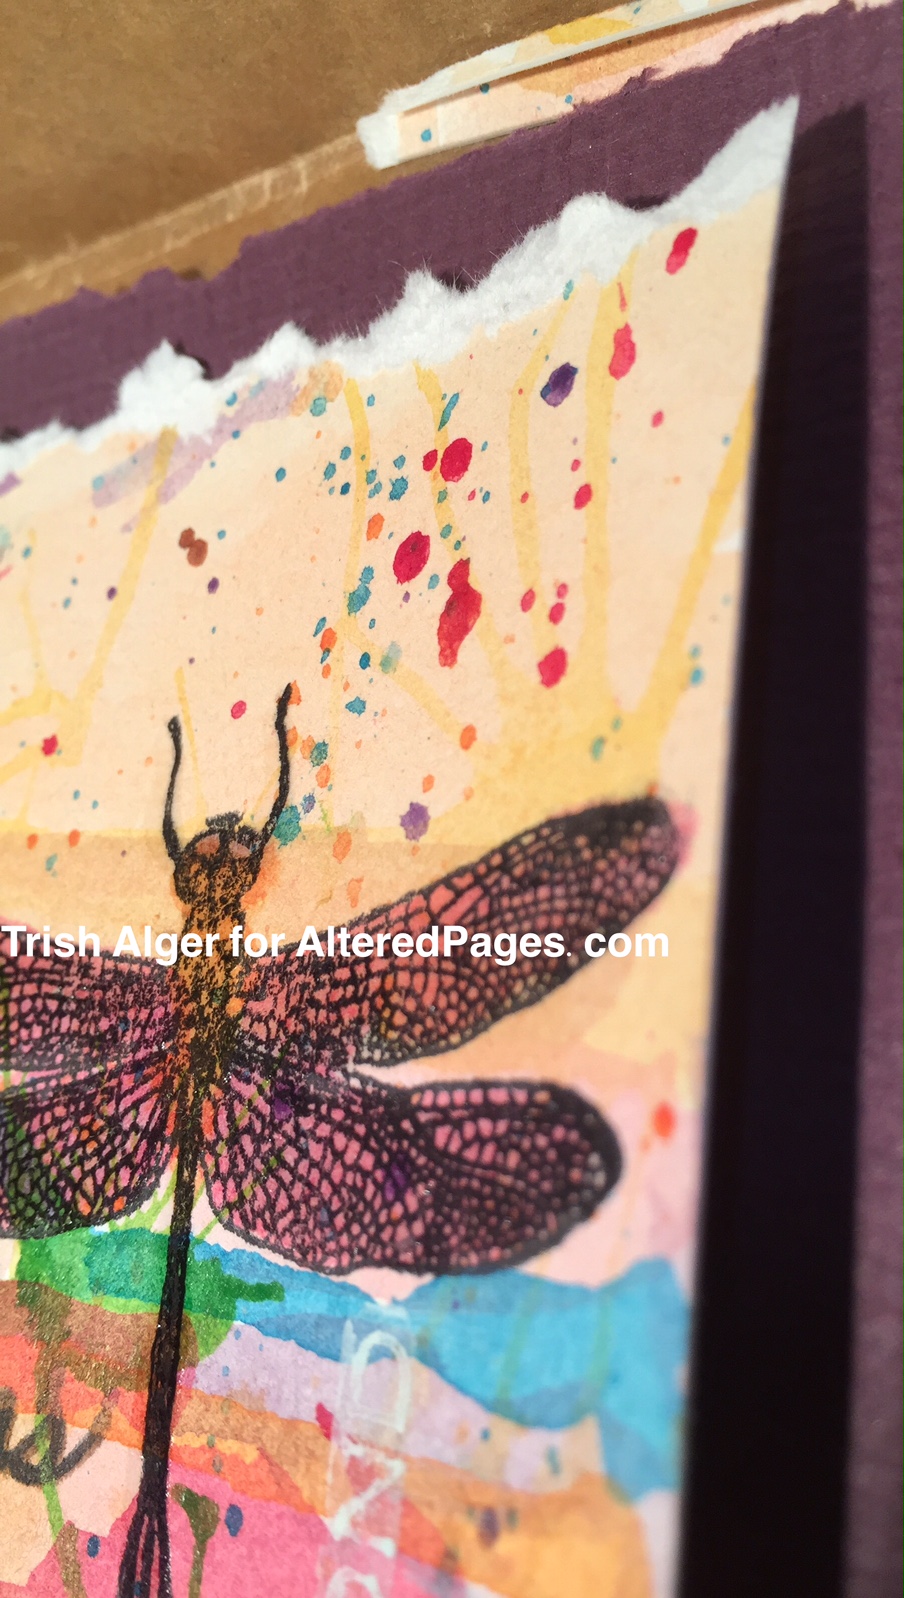
Covered the dragonfly with a thin coat of the Glaze from the Medium Textural Accents and set aside to dry.

You can see I've stamped on my project with the Pond and Dreams word stamps from this set. Use any medium you wish.

Next I wanted some more texture. A stencil and some Art Anthology Sorbet Dimensional Acrylic Paint gave me just the shine and aesthetic I was after. If you scrape a thin layer through the Stencil with one of the Spatulas -it allows the background to show.

I used Gelatos and Wink of Stella Pens and anything else from my stash on the torn edges or on the watercolored portions too. Oil Pastels are great to add atop the other mediums for some added tone and depth.
Finally I layered my watercolored piece upon some cardstock and an unusual piece of brown paper in my stash. AlteredPages has a great assortment of one-of-a-kind papers to utilize.
Here is the card front; ready for a graduate, a birthday celebration, a thank you, or even the focal point for a journal:
I so appreciate the time you took to follow my creative journey. Please let us know you were here and what you thought of the process.
Check back with us each day for more creative awesomeness from this great Design Team.
Ciao for now,
-Trish Alger
justchickenscratch.com

TREMENDOUS, ALL THE TEXTURES ARE FABULUS. I would hang this as a canvas!
ReplyDeleteLove
ReplyDeleteThis comment has been removed by the author.
ReplyDeletethis is miraculous, I love it! thanks for sharing your technique. xo
ReplyDelete