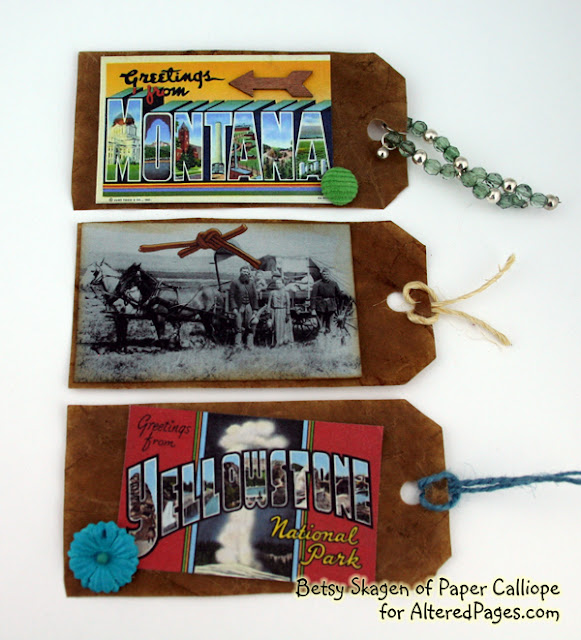
Hello Altered Pages fans. The newness has not worn off--I'm still giddy to be here. I'm Betsy Skagen of Paper Calliope and today I'm going to show you the tags that I made for my Vintage Altered Art Suitcase.
 |
| Here's a picture of the suitcase that I made in Part One of the tutorial. |
So one thing I learned from the Quintessential American Road Trip I took with my family this summer is that road trips are full of snapshot memories. Many are breathtaking, some are frustrating and a few are downright funny.
For example, it was hilarious how for the first 20 hours of our trip, all four of us got obsessed with the STUPIDEST GAME EVER. Here's the objective: to count the most cows. Yep, that's it. Could it get any more stupid?
What makes the game amusing is if your team passes a church on your side of the road, your cows marry and you get to double the number of your cows. However, if there's a cemetery on your side of the road, all your cows die and your count goes back to zero. My daughter and I, who were teamed up against my husband and son, passed five flipping cemeteries, while they passed none!
Amusing stories like these will soon be forgotten if I don't record them. Yet, I don't have a lot of time (nor motivation) to keep a journal. Thus, tags are the perfect way to easily record short snippets of memories.
Tutorial: How to make the Vintage Road Trip Tags
Step Two Print and cut out Have a Great Vacation, Summer Vacation, State of Maine, State Stamps 2361, American Travel, North Woods, Vintage Cowboys, State Postcards 2360 and Oklahoma Land Run.
Step Three Use colored pencils to add retro color to some of the black and white graphics.
Step Four Make some of the graphics appear aged (such as the "Wanted" tag below) by tearing edges and distressing with brown ink.
Step Five On one tag stamp a train onto paper you have distressed and adhere it to the tag.
Step Six Add photos or journal paper to the back sides of the tags. You can distress the journal paper by tearing the edges and inking with brown ink.
Step Seven Adjust the size of some of the collage sheets and print out smaller versions that can become stamp-like embellishments.
Step Eight Add blue and silver beads, large green glass bead, blue chain and other materials from the Art on the Orient Express Mailbox Muse Kit. Add other embellishments as you see fit.
Step Nine Tie jute string, ribbon or yarn through the tag holes, adding beads and embellishments at your discretion.
Fabulous stuff I used
Have a Great VacationSummer Vacation
State of Maine
State Stamps 2361
American Travel
North Woods
Vintage Cowboys
State Postcards 2360
Oklahoma Land Run
Train Stamp
Embellishments from Altered Pages
Embellishments from personal collection
Brown kraft glassine paper
Brown InkBlending tool
Aleens Fabric Glue
Tag Die


I love the creative way you have come up with to record those beautiful memories. Who wouldn't have a great time remembering all those precious moments kept safe in the suitcase!
ReplyDeleteLove your travel suitcase and tags! Great job!
ReplyDeleteBetsy, I like how you mixed vintage and current on these tags. They're a nice way to feature some of your favorite trip photos.
ReplyDeleteWhat a terrific tutorial - I really love the treatment you gave your tags - very effective! Wonderful memories - and a delightful suitcase full of them!
ReplyDeleteLove the suitcase and tags to commemorate your trip. You could journal your adventures on the backs of those tags, including the "silly" game, and keep your memories together inside the suitcase. Hmmmm, I think I am inspired. LOL
ReplyDelete