Hey everyone, Melodee here again. All I can say today is WOW! So much yummy goodness going on here this month I feeling like I have been stuffed with a Thanksgiving Art Feast!! LOL! So many talented design team members and talented patrons as well. Your Elves are so delicious and I am loving what all of you are creating for our November challenge.
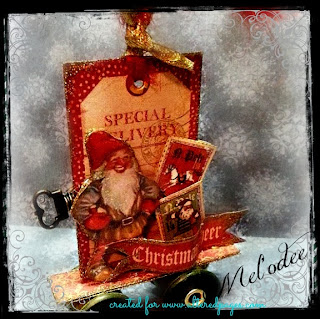
Speaking of elves, Thanksgiving is right around the corner and I bet it's even beginning to look a little like Christmas around your homes as well. I have been working on some new Christmas ornaments for my own tree this year and decided to create one more little elf ornament for you. I love victorian and vintage so with that in mind here is what I came up with
Speaking of elves, Thanksgiving is right around the corner and I bet it's even beginning to look a little like Christmas around your homes as well. I have been working on some new Christmas ornaments for my own tree this year and decided to create one more little elf ornament for you. I love victorian and vintage so with that in mind here is what I came up with
I created this little rendition of a vintage toy ornament using some spools, fibers, glitter, G45 paper and AP's Elves and Gnomes collage kit.
A few bits and baubles from my personal stash of junk'n finds, a little fussy cutting, embossing and glue and Wa La! Can't wait to hang him on my studio tree!!
(This is the back side)
What fun it was to create for you all once again. I have included a list of supplies below. I hope you have enjoyed this little guy. I will be back in two weeks with more. Until then keep coming back daily for more wonderful designs from our very talented design team!! Oh if you get a chance, I would love for you to stop in and say hi over at my own blog www.ateliermelodee.blogspot.com.
Have a Beautiful Blessed Thanksgiving my sweet art friends,
Mel’odee
AP Supplies
Elves and Gnomes collage
G45 Christmas Emporium paper
Wink of Stella glitter
Small Spools
Momentos Love Letter Red ink
Silk Fibers
Personal
Embossing powder Gold Tinsel
Gold Eyelets
Beads


This is amazing Melodee!!!! You should turn this into a kit!
ReplyDeleteYour little guys make me smile, I would love to get that delivery!!!
ReplyDeleteI agree with Becky, it's too adorable--having all the ingredients PLUS directions = Hello, Christmas elf!! :)
ReplyDeleteHow cute is this sweet little toy! I would love several on a tree.
ReplyDeleteThis is adorable, Melodee! Love it so much.
ReplyDelete