I know that the Design Team has posted there projects using the Gelli Plates , but I just had to post my project I did the other day when I was "playing" with my Gelli Plates ! I love this new product ! I could spend the whole day in my studio playing with this !

You can get your Gelli Plates HERE ! You will not be disappointed !
I wanted to use mine to create some tags, so I got out some stamps, dies that I had cut out , and my Brushsticks ( fabulous tool ) ! After I applied various paints I used my stamps , dies & made some designs with the Brushsticks. Laying the tags down on my Gelli Plate and then lifting up each tag and seeing your new design is half the fun !!!

These are just some of the tags I did, and they are ready to go now to add more layers and embellishments !!
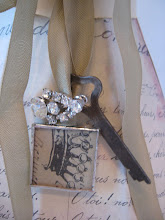
 For my birdcage tag I used a die from Altered Pages , I love how it has a worn look , I added the text "DREAM" using clear embossing powder,and an ink pad using a background stamp of dots and an ever so tiny bird stamp. The last detail was some fabric rose ribbon I sprayed with a mist to go with the tag !

Hope you will also have fun creating some tags with your Gelli Plates !! Have a fabulous day !
Eunice
The Little Things

You can get your Gelli Plates HERE ! You will not be disappointed !
I wanted to use mine to create some tags, so I got out some stamps, dies that I had cut out , and my Brushsticks ( fabulous tool ) ! After I applied various paints I used my stamps , dies & made some designs with the Brushsticks. Laying the tags down on my Gelli Plate and then lifting up each tag and seeing your new design is half the fun !!!

These are just some of the tags I did, and they are ready to go now to add more layers and embellishments !!


Hope you will also have fun creating some tags with your Gelli Plates !! Have a fabulous day !
Eunice
The Little Things
Isn't the Gelli PLate the absolute BEST tool to come around? I love your technique of ghosts ans shadows!
ReplyDeleteSo beautiful Eunice and I'm so glad you're enjoying gelli printing process.
ReplyDelete