
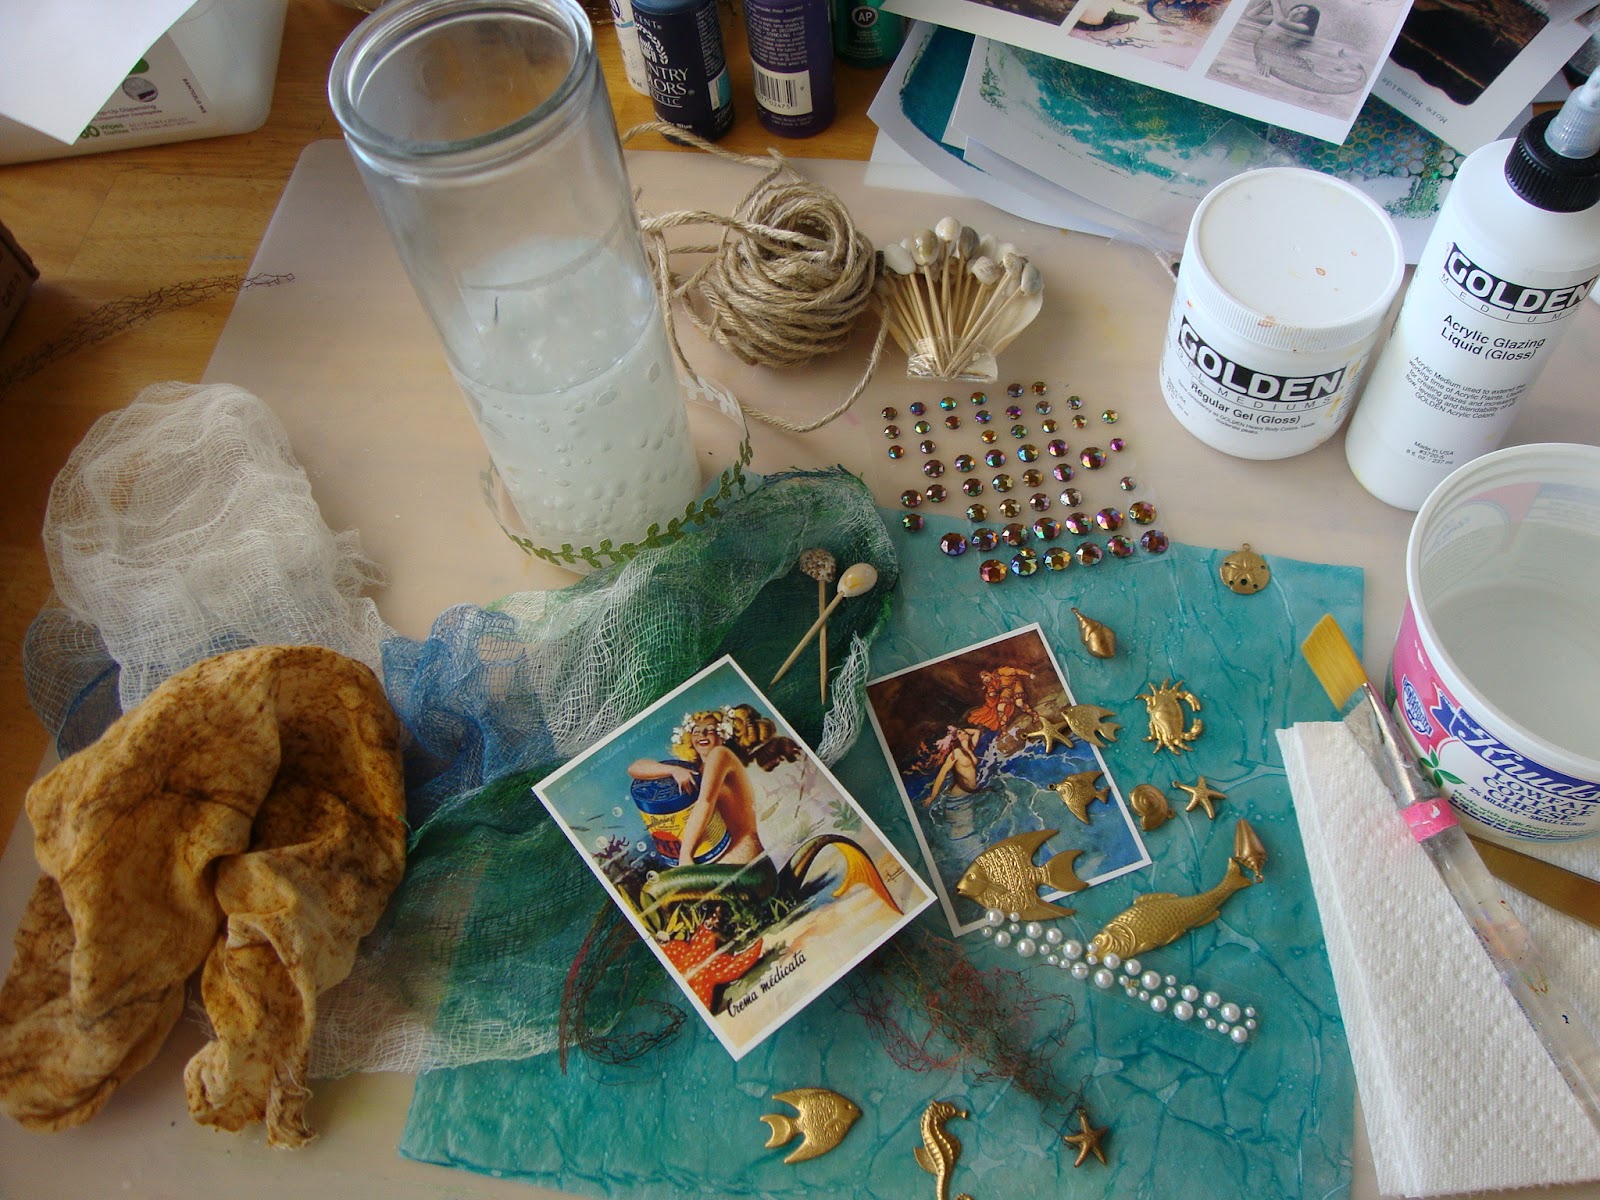
Hello there this is Ingrid here. As the mercury on the thermometer rises towards 100 degrees and beyond here in Arizona my thoughts naturally turn to cool ocean breezes and beautiful beaches. While I can't jump in the car and go to the beach right away (6 hours away) I can make something that reminds me of those places. I was inspired to do a candle after reading Jean's facebook post about wrapping a candle with images as a quick and easy project. So I gathered up my supplies; painted tissue paper, charms, Altered Pages Mermaids You Make colllage sheet and some twine, seashells, and glitter.

I wrapped the painted tissue paper and glued it in place with some gel medium - though you could use any glue you have handy - and went over the top of it as well. There was some leftover cheesecloth that I used in my Gelli printing along with some open weave ribbon that had some paint on them which was perfect for this project. The charms I had from years and years ago found a new home dangling from some cord. I painted the crab and a starfish charm with some cream and tan craft paint and distressed the rest of the charms with brown ink. Then I attached my mermaid image with eyelets and cord, added glitter and voila my mermaid candle was done! Isn't she cute?

I wrapped the painted tissue paper and glued it in place with some gel medium - though you could use any glue you have handy - and went over the top of it as well. There was some leftover cheesecloth that I used in my Gelli printing along with some open weave ribbon that had some paint on them which was perfect for this project. The charms I had from years and years ago found a new home dangling from some cord. I painted the crab and a starfish charm with some cream and tan craft paint and distressed the rest of the charms with brown ink. Then I attached my mermaid image with eyelets and cord, added glitter and voila my mermaid candle was done! Isn't she cute?

so pretty..love the seaside look and colors..I can see this in a friends seaside home..love it and the idea..thanks for the inspiration.
ReplyDeleteAwesome want one
ReplyDeleteGreat job, Ingrid!! You are a "class act"! LenaS
ReplyDelete